
8/13/2016 Webmaster
Introduction To Using Dialogs With The Microsoft Bot Framework
Using Dialogs with the Microsoft Bot Framework, allows you to model a conversation with a user. While they are more flexible than using a FormFlow, Dialogs require more code.
A Dialog is class that that implements IDialog. Dialogs can be composed with other dialogs to maximize reuse.
A Dialog has a context that contains a stack of dialogs active in a conversation and will maintain the state of the conversation. A Dialog sends messages to a user, and is suspended when it is waiting for a response from a user. The Dialog uses a state stored in its context to resume a conversation.This state is stored in the state service provided by the Microsoft Bot Framework Connector service.
Walk-Thru
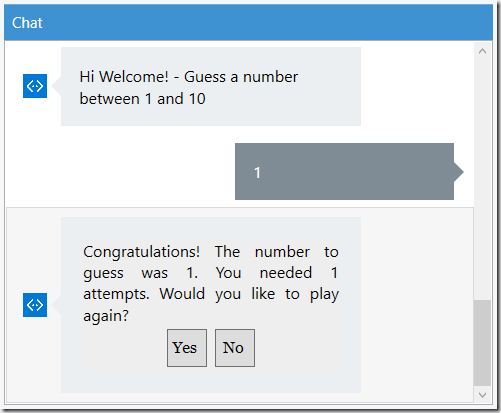
The conversation starts when the User types in a message.
The Bot responds with a greeting and the directions of the game, which is to guess a number between 1 and 10 chosen at random.

The User guesses a number and the Bot informs the User if they are correct or not.
When the User guesses the number correctly, they are offered a chance to play the game again.
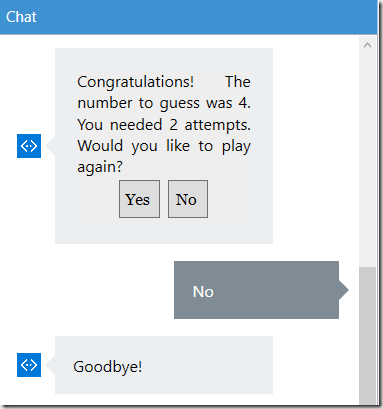
If the User chooses not to play the game again, the Bot tells them goodbye.
Creating The Application

Download the Visual Studio 2015 Microsoft Bot Framework template (using this link)
Save the .zip file in the templates directory (located at: %USERPROFILE%\Documents\Visual Studio 2015\Templates\ProjectTemplates\Visual C# ).
This creates a template that you can use in Visual Studio to create Bot projects.

Open Visual Studio.

Create a new Project.

Select the Bot Application template and name the project AiNumberGuesserBot.
The project will be created.
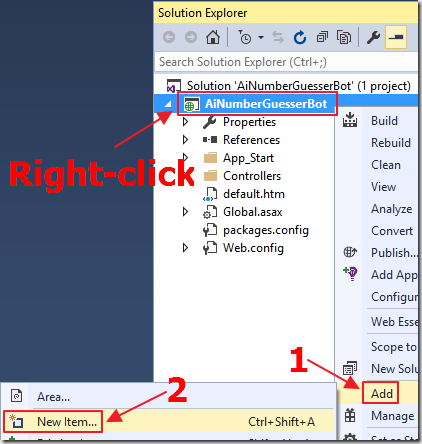
Right-click on the project, and select Add then New Item.
We will now create the class that will contain the logic for the Dialog.
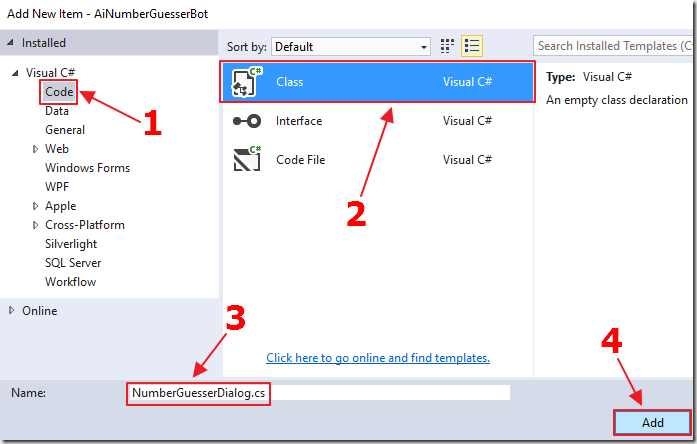
Add a new C# class called NumberGuesserDialog.cs.
Replace all the code with the following code:
using System;
using System.Threading.Tasks;
using Microsoft.Bot.Builder.Dialogs;
using Microsoft.Bot.Connector;
using System.Text;
namespace AiNumberGuesserBot
{
    [Serializable]
    public class NumberGuesserDialog : IDialog<object>
    {
        protected int intNumberToGuess;
        protected int intAttempts;
    }
}
A Dialog is a class that inherits from IDialog.
Note that we must decorate this class as [Serializable].
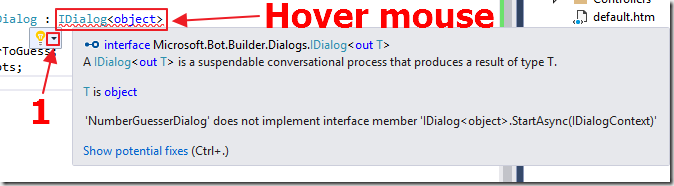
This requires you to implement a StartAsync method.
To implement this, hover the mouse over IDialog<object>, wait a few seconds, and the interface option window will appear.
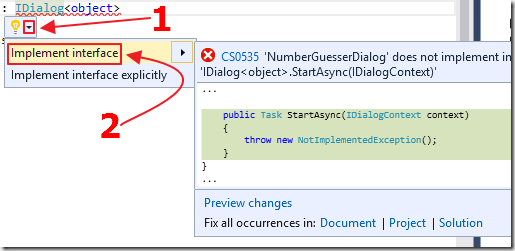
Click the black arrow next to the light bulb and select Implement interface.
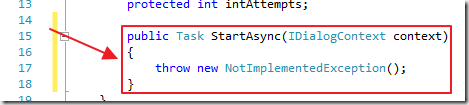
The StartAsync method will be created.
This will be called when the Dialog is first instantiated.
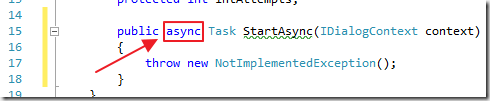
We want the code to run asynchronously so add async to the method signature.
Now, change the code inside the method so that the complete method is coded as follows:
        public async Task StartAsync(IDialogContext context)
        {
            // Generate a random number
            Random random = new Random();
            this.intNumberToGuess = random.Next(1, 10);
            // Set Attempts
            this.intAttempts = 1;
            // Start the Game
            context.Wait(MessageReceivedAsync);
        }
The last line in the method is context.Wait. This suspends the current Dialog until the user has sent a message to the Bot.
The Wait method, takes a method as a parameter, (in this case, MessageReceivedAsync), to be called to resume the conversation when the response has been received.
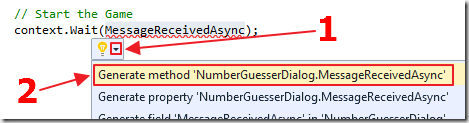
To implement it, hover the mouse over MessageReceivedAsync , wait a few seconds, and the interface option window will appear.
Click the black arrow next to the light bulb and select Generate method ‘NumberGuesserDialog.MessageReceivedAsync.

The MessageReceivedAsync method will be created.
Notice it takes the context of the Dialog and an argument (result).

Change the type of the argument from object to IMessageActivity, and change the name of the variable from result to argument.
Again, we want the code to run asynchronously so add async to the method signature and mark it as virtual.
Alter the code in the method so that the complete method is coded as follows:
        public virtual async Task MessageReceivedAsync(IDialogContext context,
            IAwaitable<IMessageActivity> argument)
        {
            int intGuessedNumber;
            // Get the text passed
            var message = await argument;
            // See if a number was passed
            if (!int.TryParse(message.Text, out intGuessedNumber))
            {
                // A number was not passed
                await context.PostAsync("Hi Welcome! - Guess a number between 1 and 10");
                context.Wait(MessageReceivedAsync);
            }
        }
Notice that the last line, (context.Wait(MessageReceivedAsync)), simply calls the method that the code is contained in, again and again.
We are only doing this to make this example as simple as possible. We will explore a more realistic example in the next section when we add a PromptDialog.
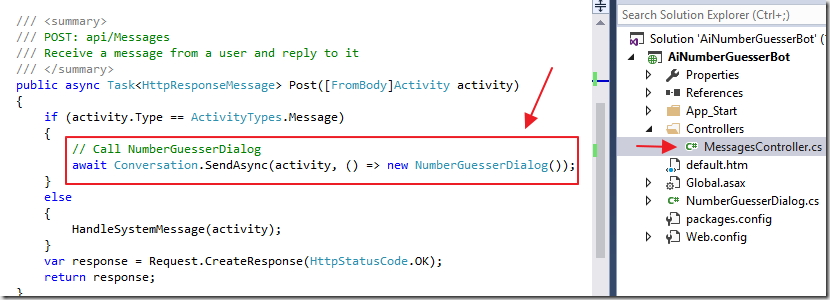
Next, open the MessagesController.cs file (at: ...\AiNumberGuesserBot\AiNumberGuesserBot\Controllers\MessagesController.cs) and replace the default code, in the code block that starts with:
if (activity.Type == ActivityTypes.Message)
… with the code:
    // Call NumberGuesserDialog
    await Conversation.SendAsync(activity, () => new NumberGuesserDialog());
This just tells the Bot to direct any messages to the NumberGuesserDialog class.
Finally, add the following using statement to the top of the code file:
using Microsoft.Bot.Builder.Dialogs;
Test The Application
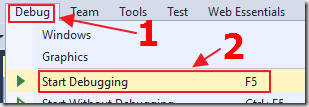
Hit F5 to run the application.
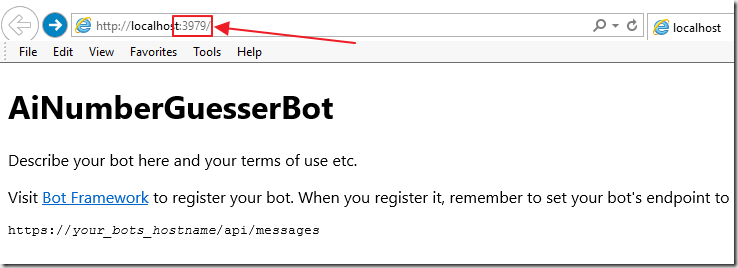
The web browser will open.
Note the port number and the web address.
Download, install, and run the Bot Framework Emulator (Windows) (also see: Mac and Linux support using command line emulator if you don’t have Windows).
When the emulator starts, connect to the Bot by setting the address to the the one indicted in the web browser (however, add /api/messages to the end).

Ensure that the Bot Url is connecting to the correct address.

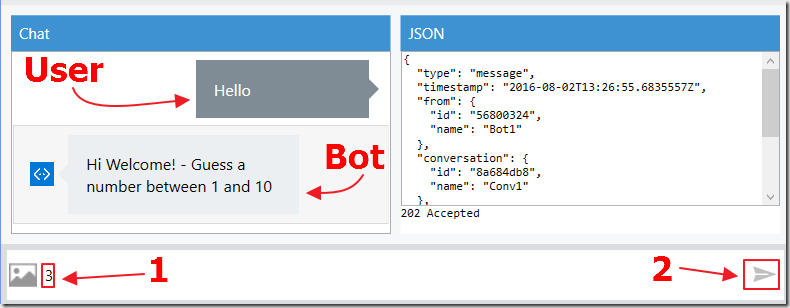
Type a message, and click the send key (or press Enter).

The Bot will respond.
This is all the Bot will do at this point, however, this example shows the minimal code to create and consume a Dialog class.
Dialog Prompts
A PromptDialog is essentially a Dialog factory for creating simple prompts. It allows you to ask the User for a response, and indicate what code will run when the response is given. A PromptDialog spawns a sub-dialog that has its own private state. This sub-dialog is suspended by the Microsoft Bot Framework Cloud service while it waits for a response. When it gets a response, it resumes at the point in the code that it was at when it was suspended.
This is the primary means of controlling program flow within a Dialog class.
A PromptDialog can be one of the following types:
- Prompt for an attachment.
- Prompt for one of a set of choices.
- Ask a yes/no question.
- Prompt for a long.
- Prompt for a double.
- Prompt for a string.
We will enhance our application to implement a PromptDialog that asks a yes/no question.
First, add the following code to the MessageReceivedAsync method:
        // This code will run when the user has entered a number
        if (int.TryParse(message.Text, out intGuessedNumber))
        {
            // A number was passed
            // See if it was the correct number
            if (intGuessedNumber != this.intNumberToGuess)
            {
                // The number was not correct
                this.intAttempts++;
                await context.PostAsync("Not correct. Guess again.");
                context.Wait(MessageReceivedAsync);
            }
            else
            {
                // Game completed
                StringBuilder sb = new StringBuilder();
                sb.Append("Congratulations! ");
                sb.Append("The number to guess was {0}. ");
                sb.Append("You needed {1} attempts. ");
                sb.Append("Would you like to play again?");
                string CongratulationsStringPrompt =
                    string.Format(sb.ToString(),
                    this.intNumberToGuess,
                    this.intAttempts);
                // Put PromptDialog here
            }
        }
This code will simply keep looping, and counting the guessing attempts, if the user does not guess the random number.
If the user does guess the number, the code in the else block will be called.
Right now it will not do anything. We will add a PromptDialog under the line: // Put PromptDialog here.
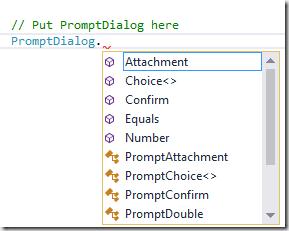
Type PromptDialog and press the period (.) key. The autocomplete options will show and we will see the option to implement the various types of PromptDialogs.
Choose the Confirm option.

We can see in the documentation, the method signature requires us to pass the current context, indicate the method to be called when we get a response (resume handler), a message to show the user (prompt), and a message to display if the response type is not correct (retry). The other parameters are optional.
The following shows the complete code for our implementation:
    PromptDialog.Confirm(
        context,
        PlayAgainAsync,
        CongratulationsStringPrompt,
        "Didn't get that!");
We now need to implement the resume handler method to handle the response (PlayAgainAsync).
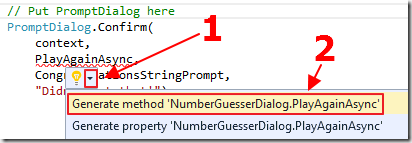
To implement it, hover the mouse over PlayAgainAsync, wait a few seconds, and the interface option window will appear.
Click the black arrow next to the light bulb and select Generate method ‘NumberGuesserDialog.PlayAgainAsync’.

The method will be created.

Add async to the method signature.
Alter the method so that the complete code is as follows:
    private async Task PlayAgainAsync(IDialogContext context, IAwaitable<bool> result)
    {
        // Generate new random number
        Random random = new Random();
        this.intNumberToGuess = random.Next(1, 10);
        // Reset attempts
        this.intAttempts = 1;
        // Get the response from the user
        var confirm = await result;
        if (confirm) // They said yes
        {
            // Start a new Game
            await context.PostAsync("Hi Welcome! - Guess a number between 1 and 10");
            context.Wait(MessageReceivedAsync);
        }
        else // They said no
        {
            await context.PostAsync("Goodbye!");
            context.Wait(MessageReceivedAsync);
        }
    }
Hit F5 to run the program, and connect to it using the Bot Framework Emulator…
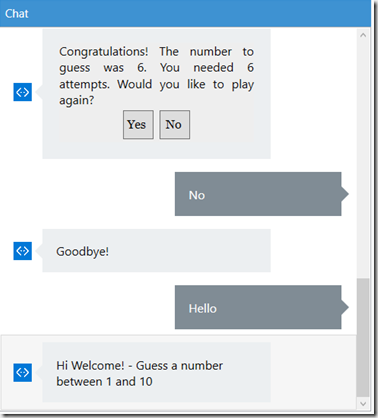
When we guess the correct number, the PromptDialog will appear. When we provide an answer, the PlayAgainAsync method will immediately run to process our answer.
We can spawn another PromptDialog inside the PlayAgainAsync method if we choose, effectively creating an endless chain of PromptDialogs to create branches of code for a conversation.
Microsoft Links
Bot Framework Forum (stack overflow)
Visual Studio 2015 Bot Project Template
Bot Framework Emulator (Windows)
Download
You can download the code from the Download page