
8/15/2016 Webmaster
Creating a Skype Bot Using The Microsoft Bot Framework
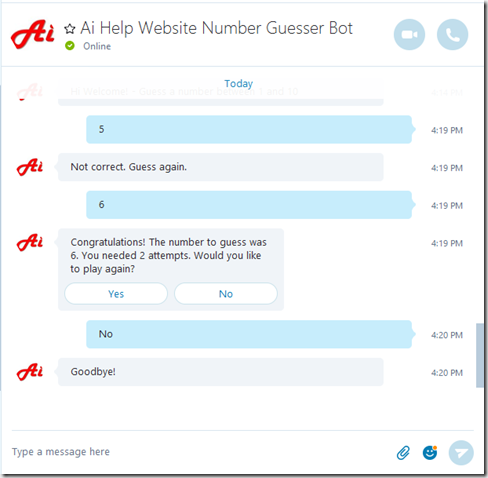
Note: You can test out the sample Bot from this article in Skype using this link: https://join.skype.com/bot/d6a7af21-b56f-411f-b7cf-868d0fdbb1ba.
You can easily create a Skype Bot and deploy it to Skype.
To do this, we will use the Microsoft Bot Framework that contains the following components:
- Bot Connector – A service that connects your bot to communication channels such as Facebook, Skype, and email.
- Bot Builder – A C# and Node.js library that provides a powerful framework for constructing bots that can handle freeform and guided interactions.
- Bot Directory – A directory of Bots that you can connect to.
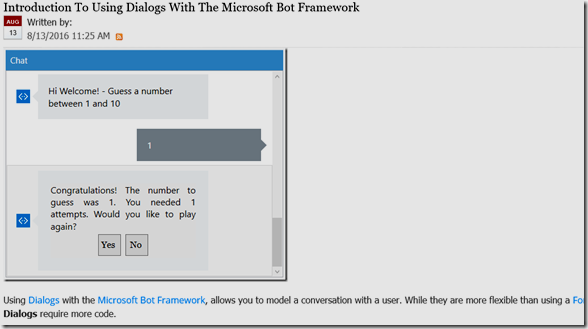
To demonstrate this, we will start with the Bot created in the article: Introduction To Using Dialogs With The Microsoft Bot Framework.
Publishing The Bot
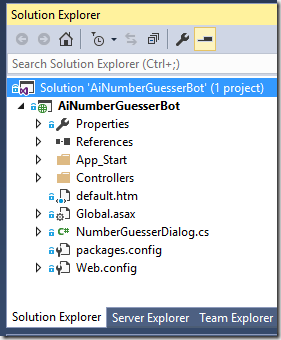
The first step is to connect the AiNumberGuesserBot, that we created in Introduction To Using Dialogs With The Microsoft Bot Framework, to the Microsoft Bot Connector.
To do this, we need to publish it in a publically accessible location. This can be any server, however, publishing to Azure is recommended because publishing to it has built-in support in Visual Studio.
First, go to https://azure.microsoft.com and create an account and a subscription (if you don’t already have one).
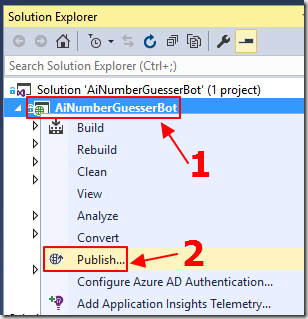
Next, open the AiNumberGuesserBot project in Visual Studio, and right-click on the Project node (not the Solution node), and select Publish.
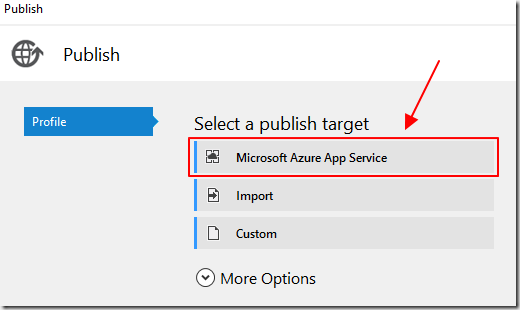
Select Microsoft Azure App Service.
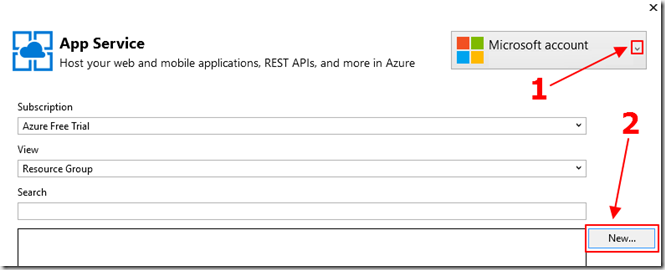
Sign into your Azure account, then click the New button.
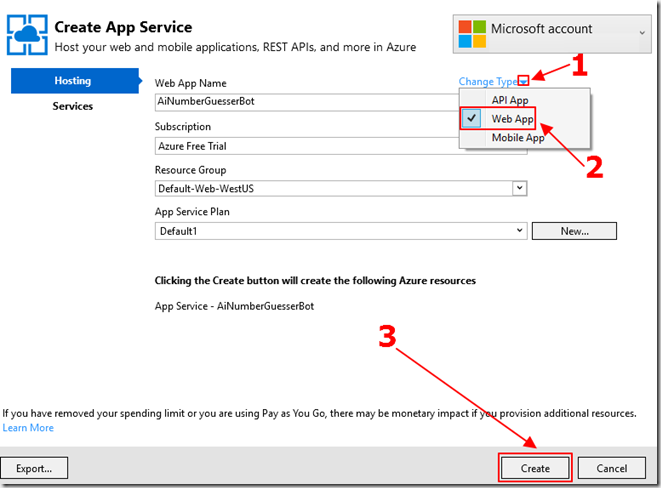
Ensure that the type is Web App.
Enter a unique Web App name, select your subscription, select or create a service plan, and resource group, and click the Create button.

After the web app has been created, click the Publish button.
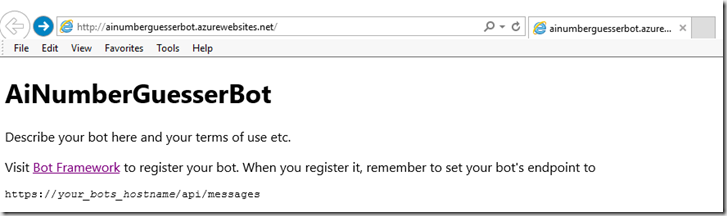
The web app will open in the web browser.
Note the web address, you will need it in a later step.
Registering The Bot With The Bot Connector

Go to the Microsoft Bot Framework portal at http://dev.botframework.com and sign in with your Microsoft Account.

Select Register a bot.
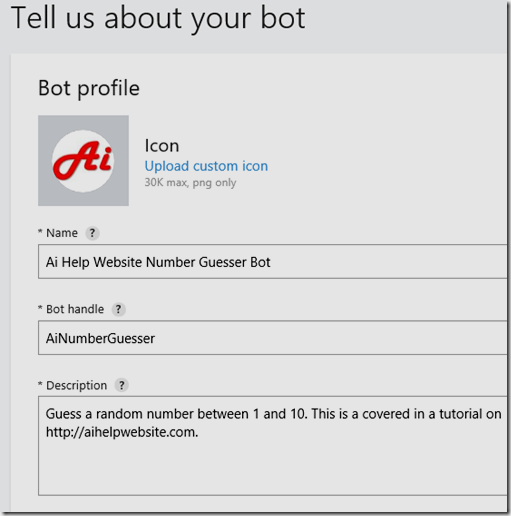
Fill in all the fields.
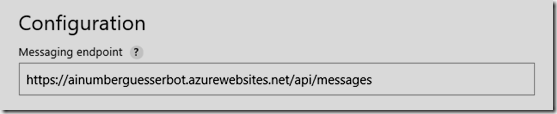
Note: That the end point web address is what you saw when the web browser opened in the previous step.
However, you have to add “/api/messages” to the end of the address and use “https://” rather than “http://”.
![]()
At one point in the form you will see a link that you will click to go to:
https://apps.dev.microsoft.com
It is there that you will get an Application ID and a password.
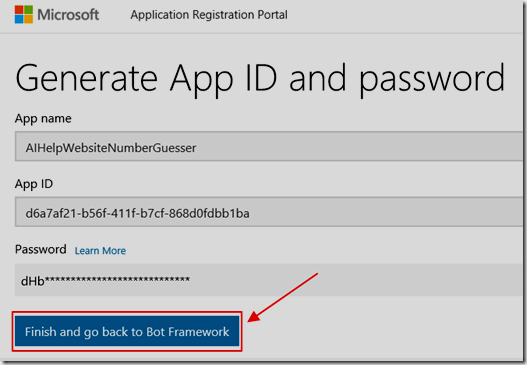
Make a note of them because you will need to use them to update the web.config file in the Visual Studio project later.
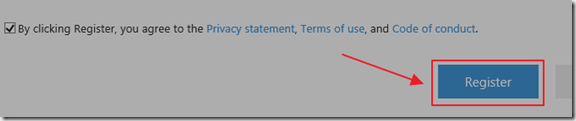
Click the Register button.
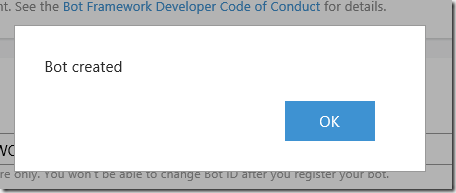
The Bot registration will be created.
When you return to the http://dev.botframework.com page you will see that the Microsoft App ID from the https://apps.dev.microsoft.com site has been entered into your Bot’s configuration.
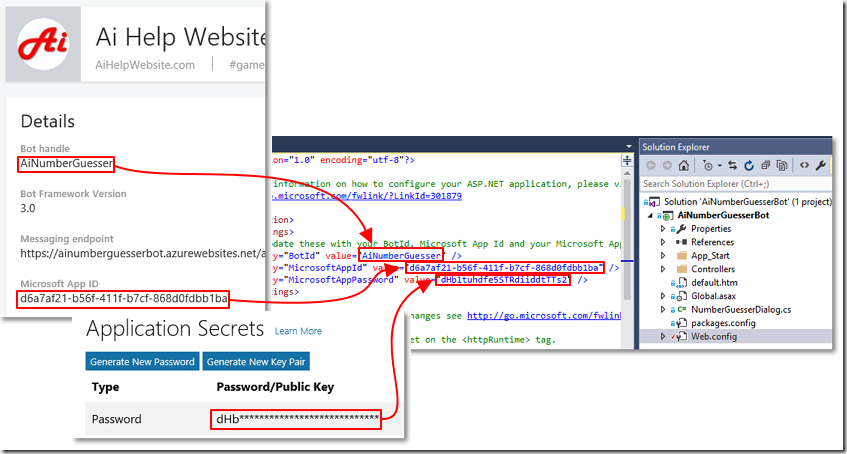
Copy the Bot ID (Bot handle) and MicrosoftAppId and MicrosoftAppPassword from the http://dev.botframework.com and the https://apps.dev.microsoft.com sites to the web.config of the Bot in Visual Studio.
Note: If you forgot to note the MicrosoftAppPassword in the earlier step, you can click the Generate New Password button on the https://apps.dev.microsoft.com site to create another one.

In Visual Studio, Publish the Bot again.
You are doing this because the Bot Connector will pass the Bot ID and MicrosoftAppId and MicrosoftAppPassword when it communicates with it.
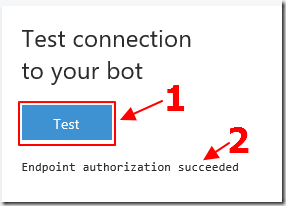
Return to the Bot configuration page on the http://dev.botframework.com site.
You can now click the Test button on that page to test the connection to your Bot.
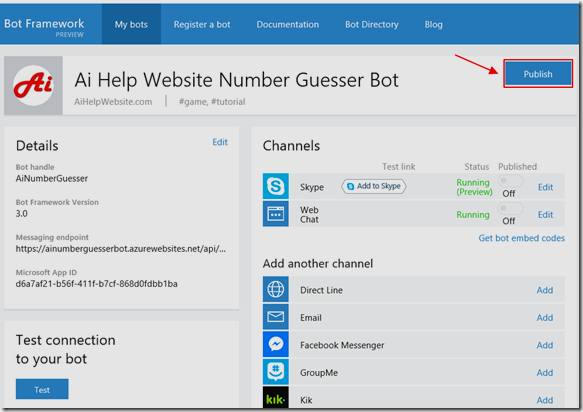
You can now configure channels to your Bot.
When you have configured channels, if you desire, you can click the Publish button to submit your bot to the Bot Directory.
Even if you do not publish it to the Bot Directory, you can still call it from your own applications and through any channels you configure.
Configure Skype
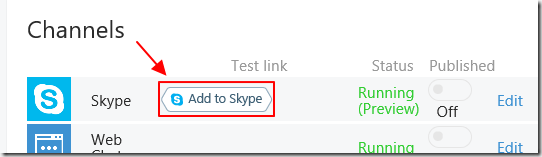
To add the Bot to Skype, click the Add to Skype button on the Bot configuration page on the http://dev.botframework.com site.
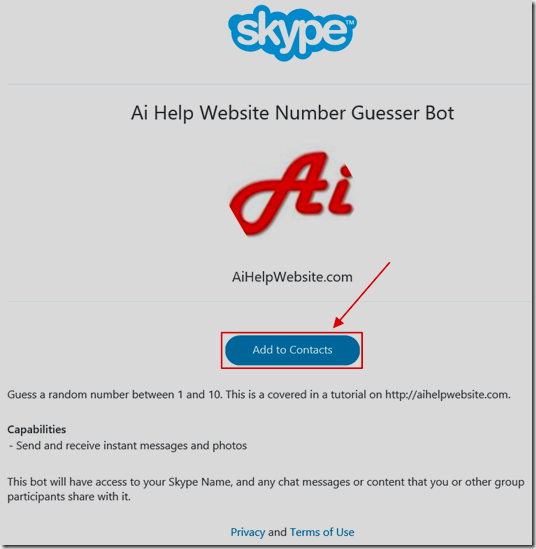
You will be directed to a Skype configuration page for the Bot.
Click the button to Add to Contacts.
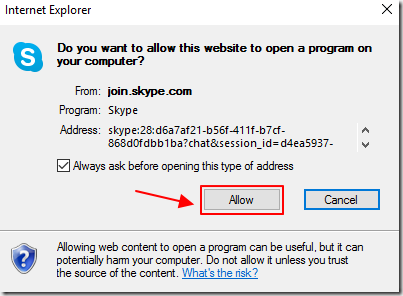
Click Allow on the popup that will show.
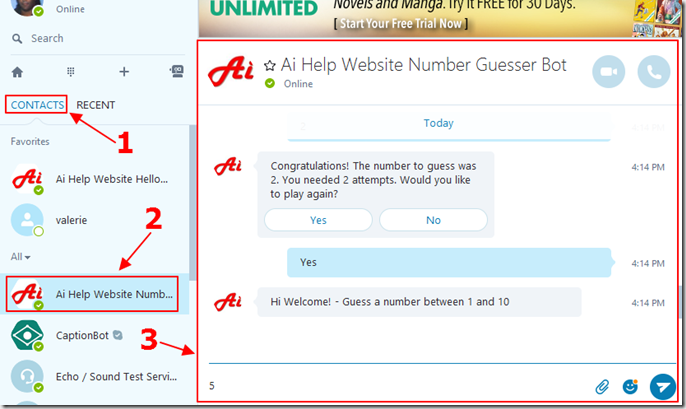
Skype will open and you can select the Bot from your contacts and converse with it.
Links
Creating a Hello World! Bot Using The Microsoft Bot Framework