
6/10/2019 Webmaster
Calling A Custom Service From Dynamics 365 Virtual Agent for Customer Service
The Dynamics 365 Virtual Agent for Customer Service is a web based application that allows you to easily create a bot that interacts with your customers. In this article we will implement an enhancement that allows it to retrieve help desk tickets based on a custom search.
Walk-Thru Of The Solution
This article describes the steps to extend the Dynamics 365 Virtual Agent for Customer Service to allow the user to query their instance of the popular open source Help Desk application ADefHelpDesk.com, and retrieve the top help desk tickets matching a search term they provide.
This article will only cover how to implement a simple search, however, for a final application we would want to implement additional methods to allow help desk tickets to be created and to implement security that allowed a person to only search their own tickets.
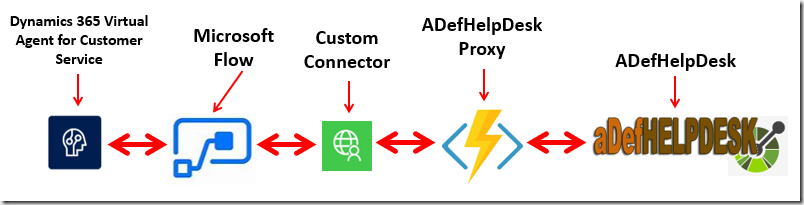
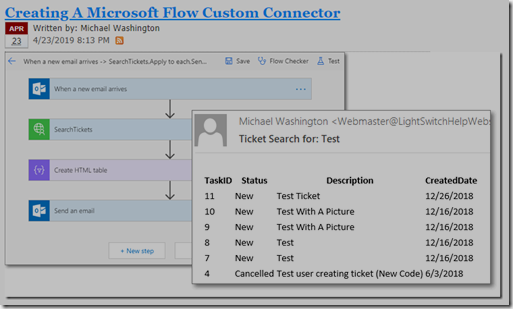
Dynamics 365 Virtual Agent for Customer Service is extended by adding a new Topic (the complete Topic used shown in the diagram above).
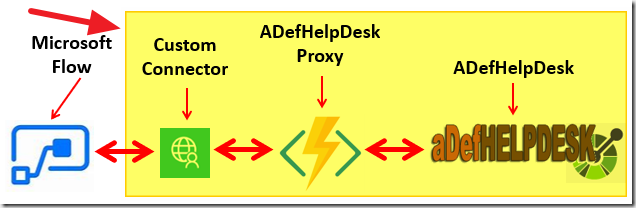
This Topic calls a Microsoft Flow that calls a Custom Connector (SearchTickets) that passes the query to the ADefHelpDesk site and retrieves the results.
ADefHelpDesk
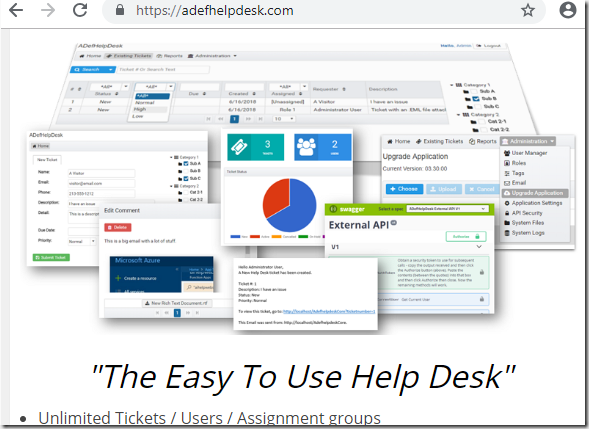
You can download and install ADefHelpDesk from the site at: http://ADefHelpDesk.com.
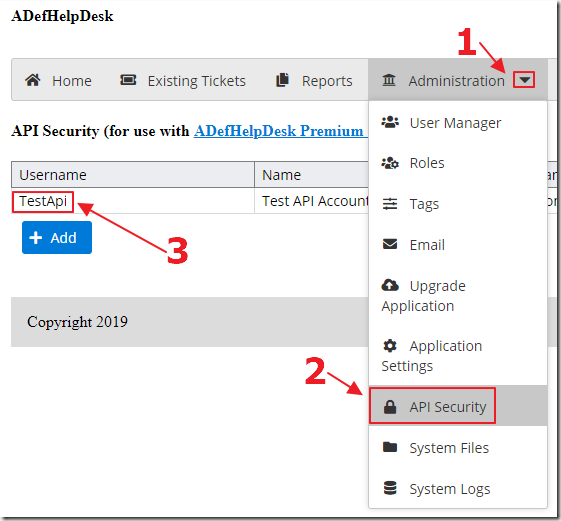
After you have the site running, follow the directions at the link: API Security (Swagger Rest API) on the documentation page that can be found at this link to create an account that can call the API.
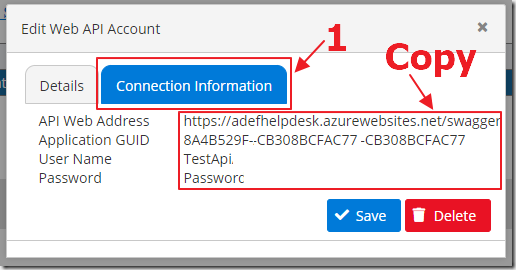
You will need to copy the information on the Connection Information tab to use later.
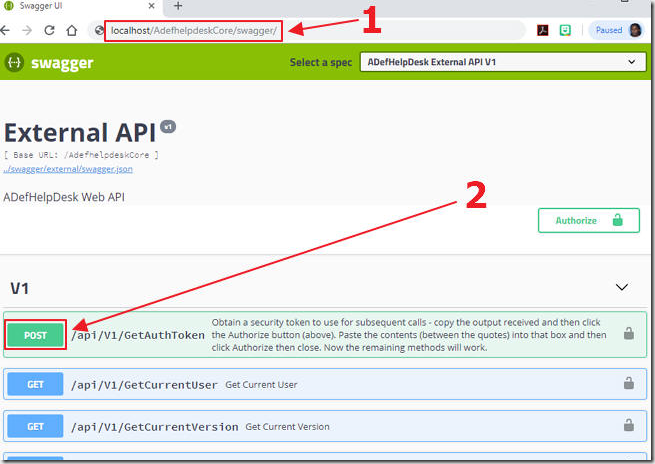
In the ADefHelpDesk site there is a Swagger page (to learn about Swagger, see: https://swagger.io/), that documents the REST based API endpoints at: http://{your default web address}/swagger/ (for example: http://adefhelpdesk.azurewebsites.net/swagger/).
You will also want to create a few Help Desk Tickets, of various Statuses and Assignments, so that you have something to search for.
The ADefHelpDesk Proxy Website and Custom Connector
The article Creating A Microsoft Flow Custom Connector describes the process to create a proxy website and a Microsoft Flow Custom Connector.
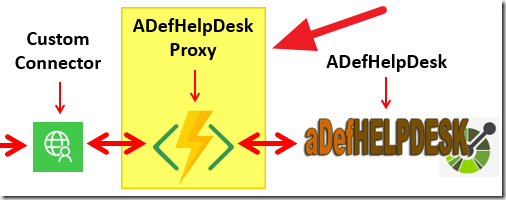
The article covers how to create a proxy website that sits between ADefHelpDesk and the Microsoft Flow Custom Connector.
We create a proxy application that will sit between the Microsoft Flow and the ADefHelpDesk application for the following reasons:
- The ADefHelpDesk application will return a complex response that the Microsoft Flow will be unable to understand and consume. For example, ADefHelpDesk will return nested collections of tags related to Tickets. The proxy project will return a response that Microsoft Flow can understand.
- Before we can retrieve the Tickets in the ADefHelpDesk application, we need to obtain an authorization token (also called a JSON Web Token (JWT) or Bearer Token). Subsequent calls to the ADefHelpDesk API are made using this token. The proxy project will handle this requirement.
The Creating A Microsoft Flow Custom Connector article also describes how to create a Custom Connector that can then be selected in the Microsoft Flow website…
… and incorporated into any Microsoft Flow.
Creating The Solution: ADefHelpDesk
First, install ADefHelpDesk (described at this link) and, create a proxy website and Microsoft Flow Custom Connector (see the Proxy Project and Create The Custom Connector sections at this link).
Creating The Solution: The Microsoft Flow
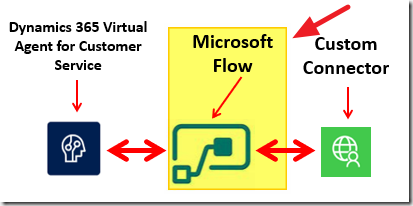
We will now create the Microsoft Flow that will communicate between the Dynamics 365 Virtual Agent for Customer Service Bot and the ADefHelpDesk application (through the Custom Connector).
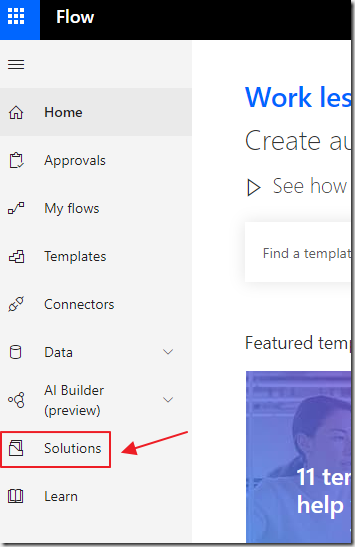
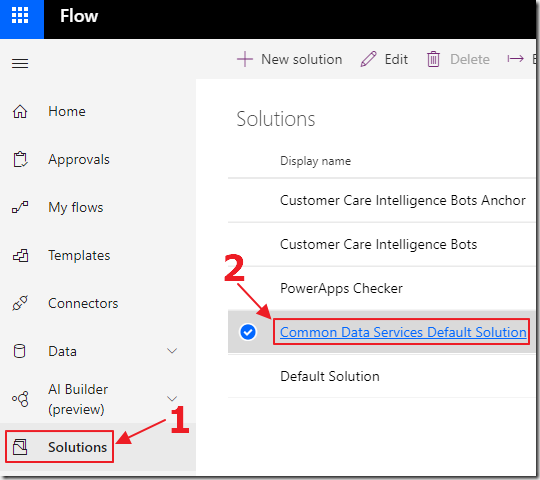
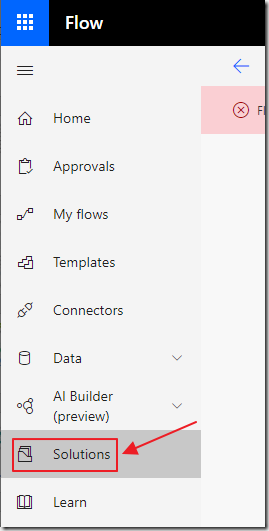
First, go to https://us.flow.microsoft.com, log in, and select Solutions.
Note: You must create your Flows as Solutions to have them work with the Dynamics 365 Virtual Agent for Customer Service.
Note: If you encounter any errors see the Troubleshooting section at the end of this article

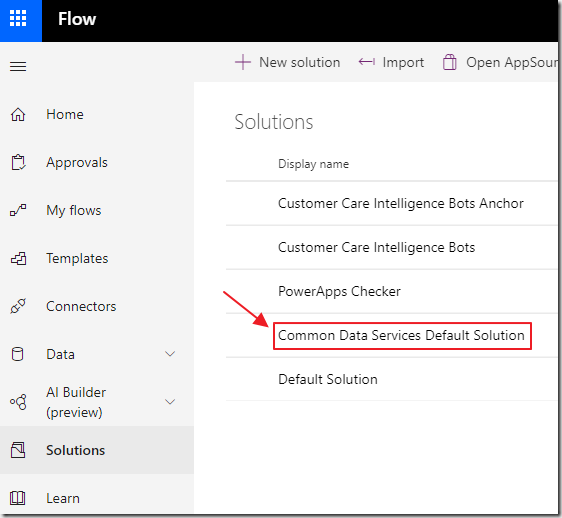
Click on the Common Data Services Default Solution link.
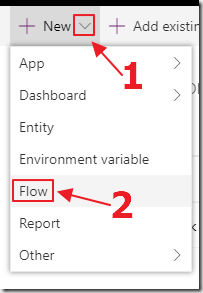
Select New then Flow.
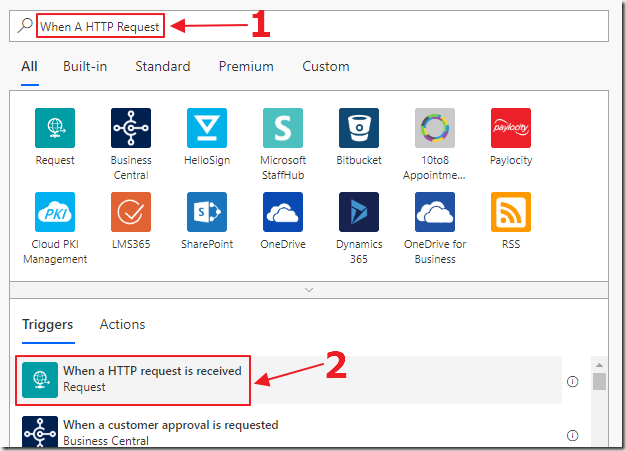
Search for When a HTTP Request and select it from the Triggers list.
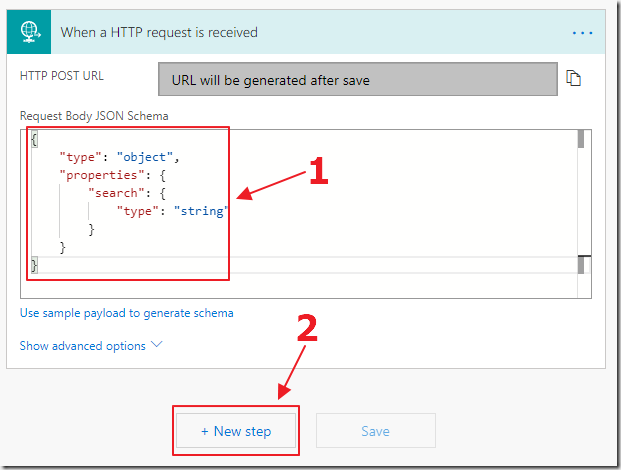
Enter into the Request Body JSON Schema textbox:
{
    "type": "object",
    "properties": {
        "search": {
            "type": "string"
        }
    }
}
Click New Step.
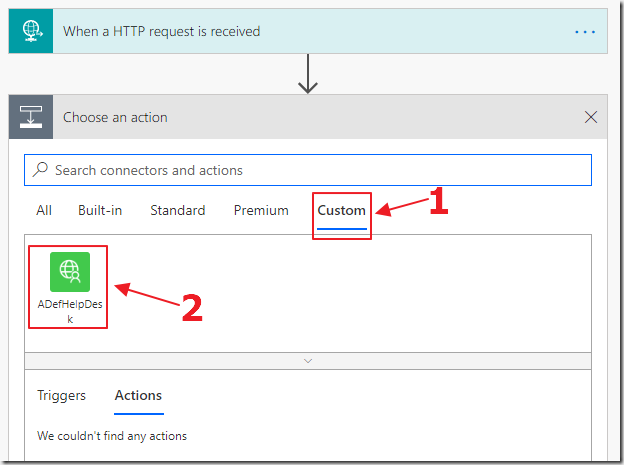
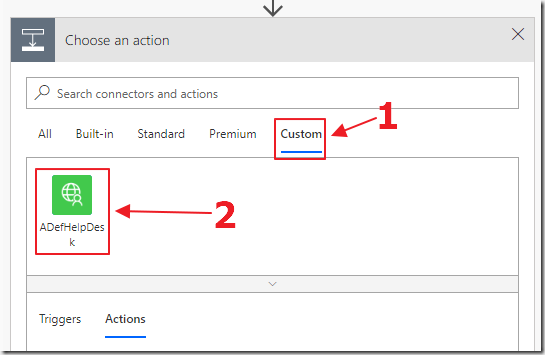
Select the Custom tab and the Microsoft Flow Custom Connector, created in the previous step, will show.
Select it.
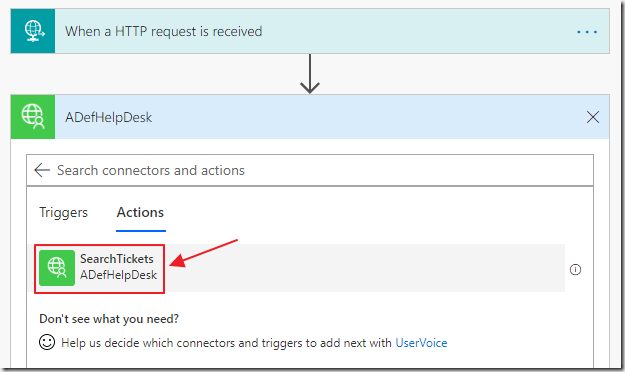
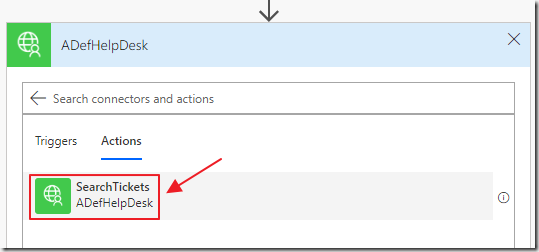
All the possible Actions in the Custom Connector will show.
In this case there is only one.
Select it.
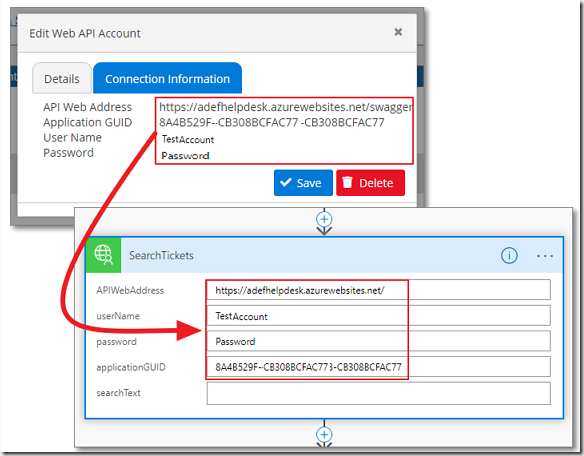
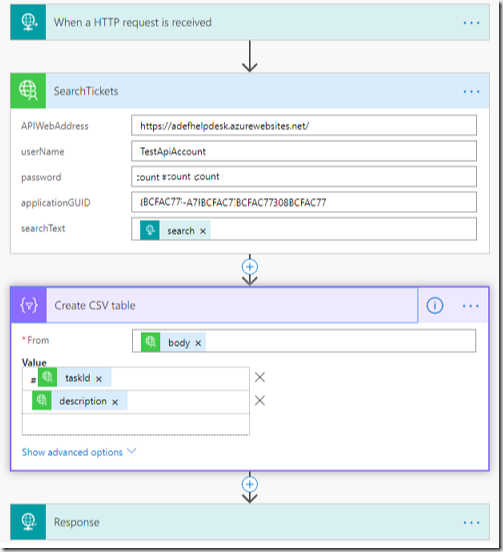
Fill in the parameters from the ADefHelpDesk site.
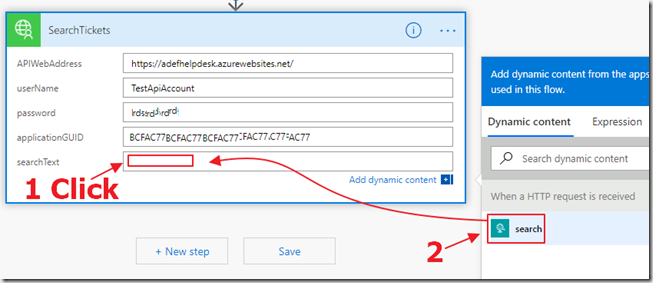
To set the searchText, click in the searchText box.
This will bring up the parameters gathered from the previous step[s] (in this case, the When a HTTP request is received step), allowing us to select the Search parameter from the Dynamic content list.
This means that the value of the Search parameter will be used as the search term when searching the Help Desk Tickets in the ADefHelpDesk site.
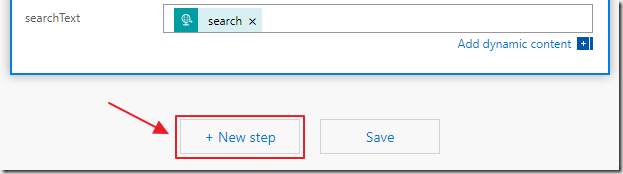
Click New Step.
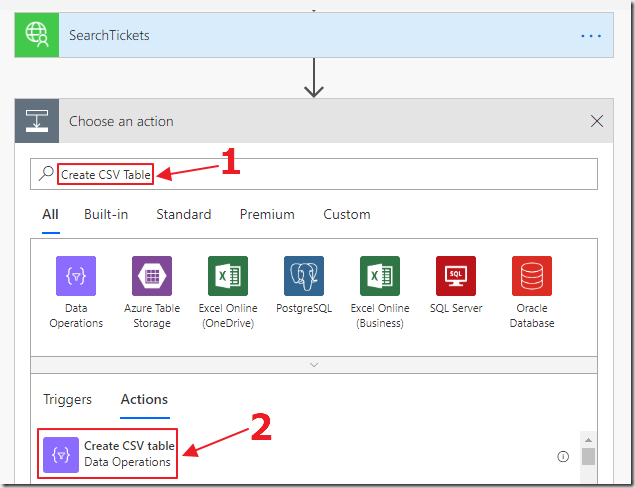
Search for Create CSV Table and select it from Actions.
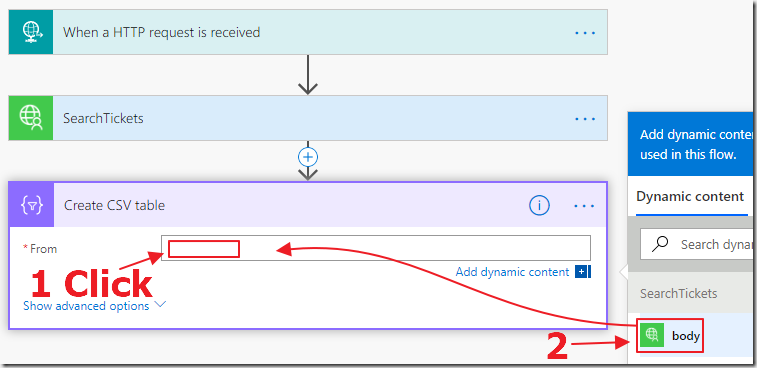
Click in the From textbox, select Body from the Dynamic content option list.
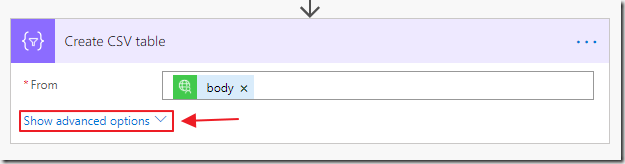
Next, click Show advanced options.
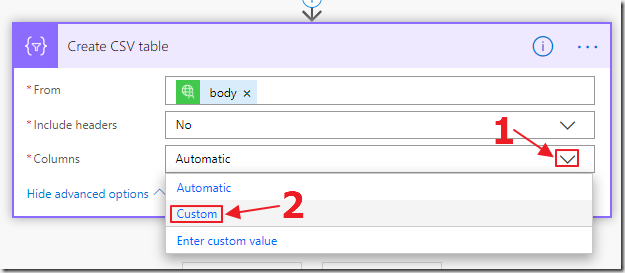
For Columns, select Custom.
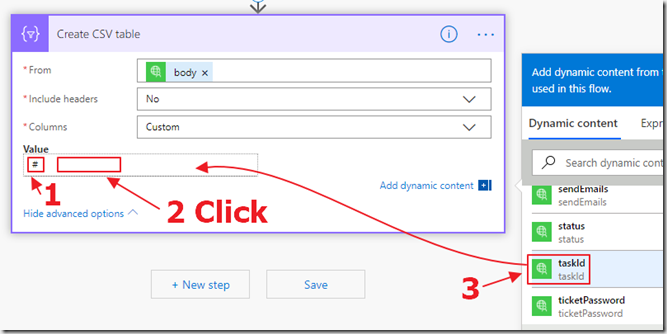
Enter a # sign in the first field, then click on it, and add taskId from the Dynamic content list.
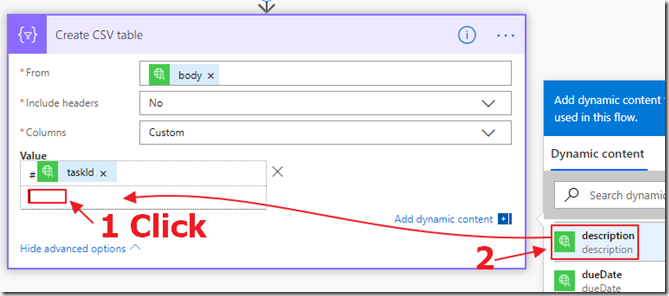
Add description, from the Dynamic content list, for the second field.
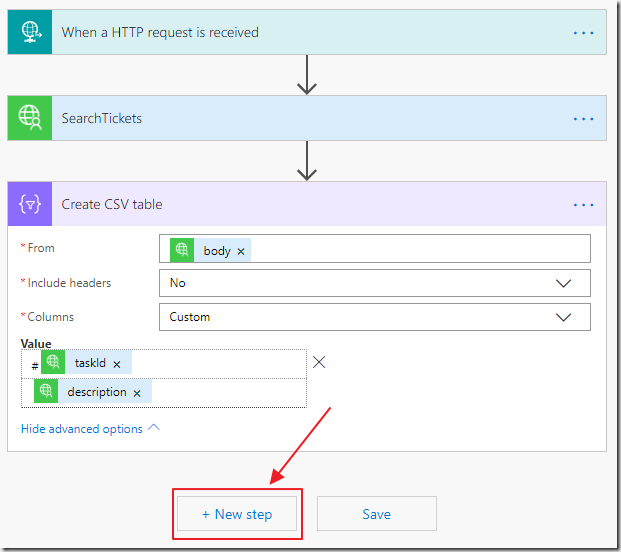
Click New Step.
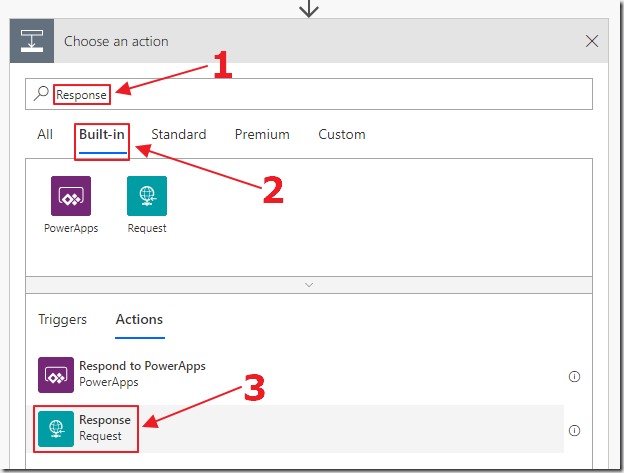
Search for Response and select it.
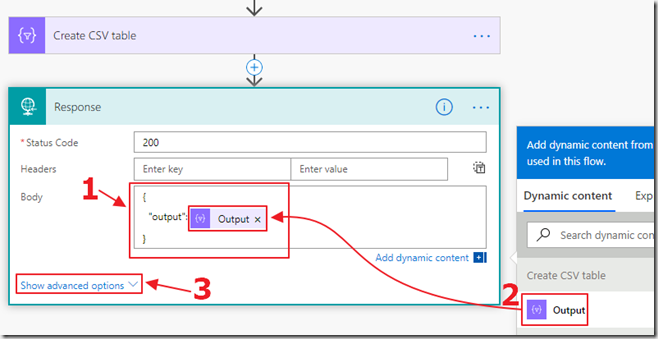
1. Enter the following in the Body textbox:
{
  "output":
}
2. Set the value of the “output” to the Output parameter, from the Dynamic content list, from the Create CSV table control.
3. Click the Show advanced options link.
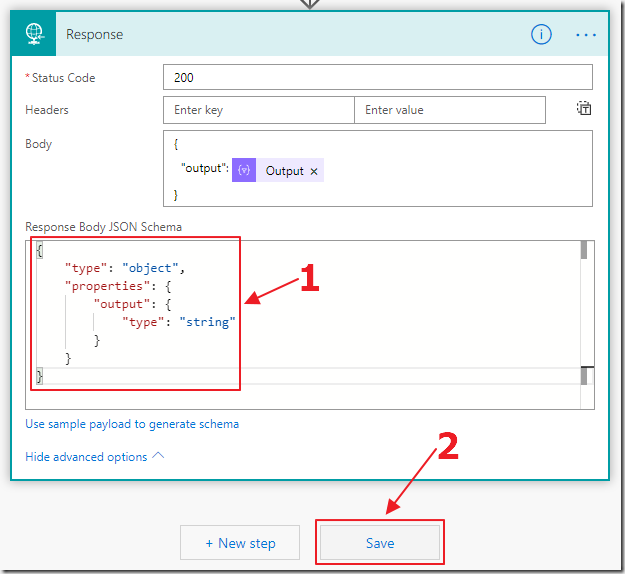
Enter the following in the Response Body JSON Schema box:
{
    "type": "object",
    "properties": {
        "output": {
            "type": "string"
        }
    }
}
Click the Save button.

Click the Solutions link and then click on the Common Data Services Default Solution link.
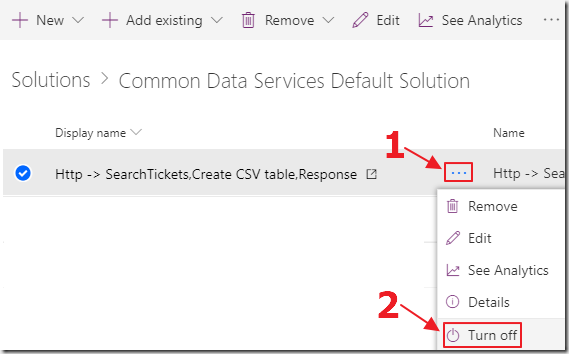
Select the properties for the Flow and select Turn off.
Note: You must turn off the Flow before editing it.
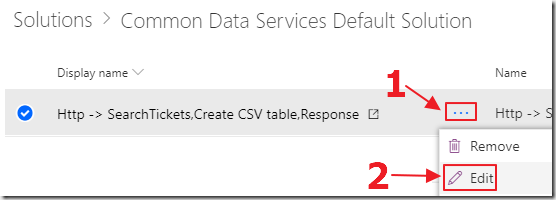
Now select properties again and select Edit.
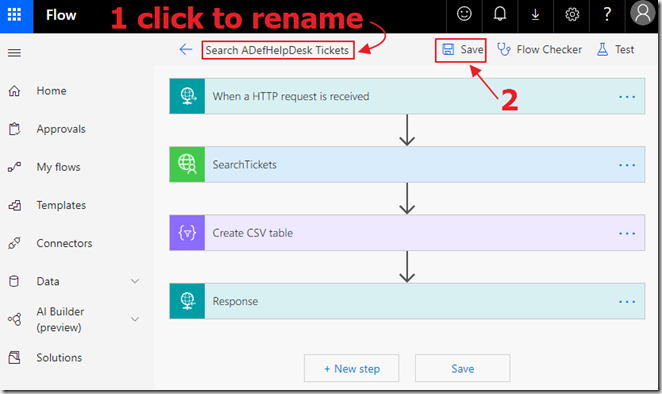
Click on the name, rename it to Search ADefHelpDesk Tickets and click the Save button.
Click the Solutions link and then return to the Common Data Services Default Solution.
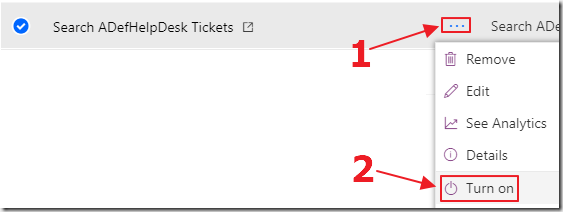
Select the properties for the Flow and select Turn on.
The Microsoft Flow is now complete.
You can close the web browser window.
Creating The Solution: Create The Dynamics 365 Virtual Agent for Customer Service Bot

The final step is to create the Dynamics 365 Virtual Agent for Customer Service bot that will consume the Microsoft Flow.
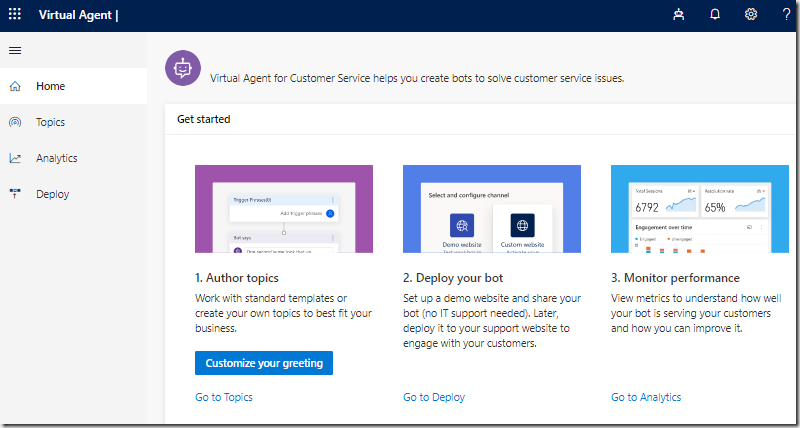
Go to: https://va.ai.dynamics.com and Sign in to create your Dynamics 365 Virtual Agent for Customer Service bot.
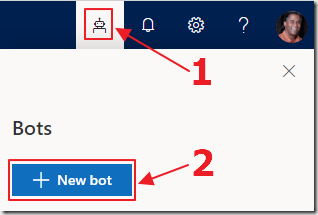
A default bot will be created for you, however, you can select the bot icon and select New bot…
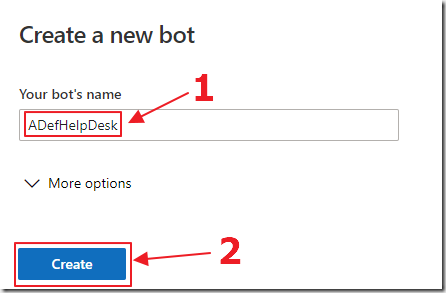
Give the bot a name and select Create.
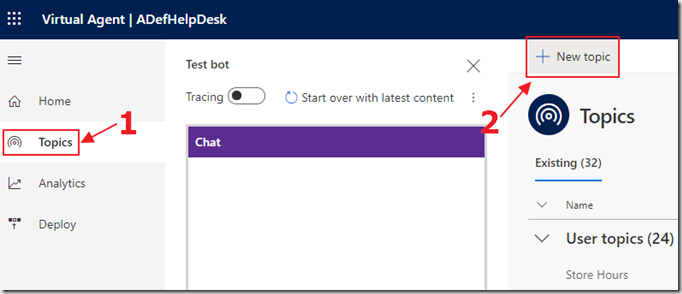
Click on Topics then New Topic.
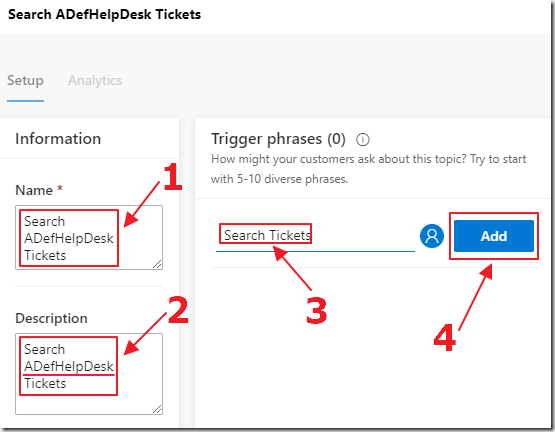
Enter Search ADefHelpDesk Tickets for the Name and Description boxes.
Enter Search Tickets for the Trigger phrases and click the Add button.
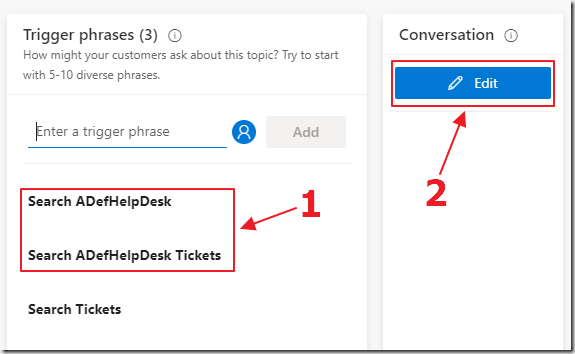
Add additional Trigger phrases.
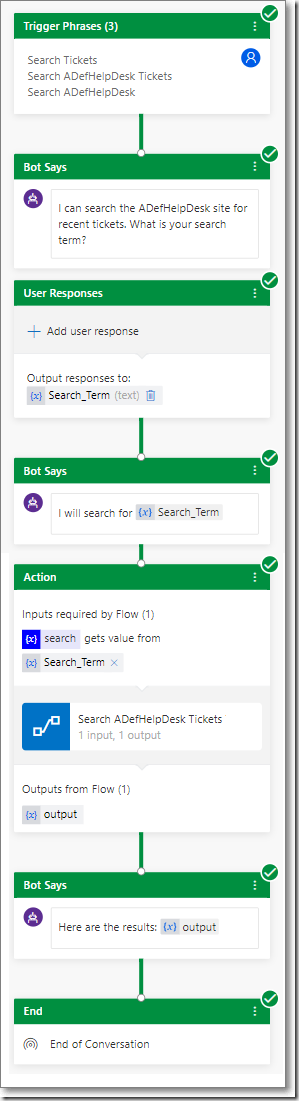
Click the Edit button to edit the conversation for the Topic.
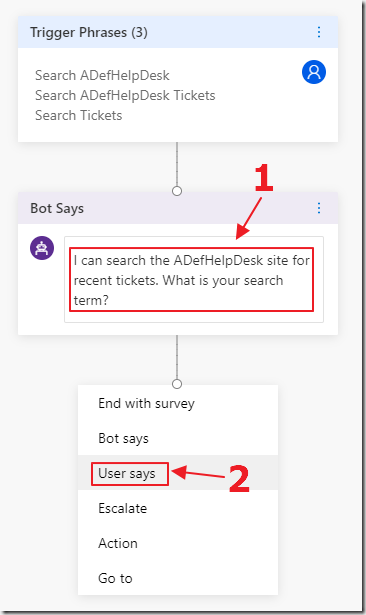
Enter in the Bot Says box:
I can search the ADefHelpDesk site for recent tickets. What is your search term?
Then, click User Says.
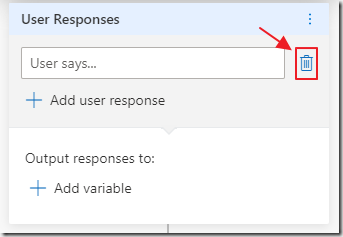
Click the trashcan button to delete the option box.
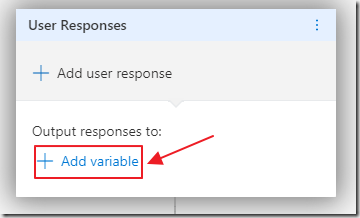
Click the Add variable button.

Click Create variable.
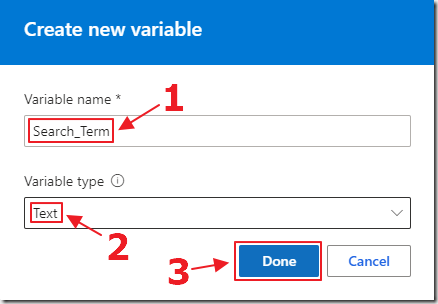
Name the variable Search_Term and click the Done button.
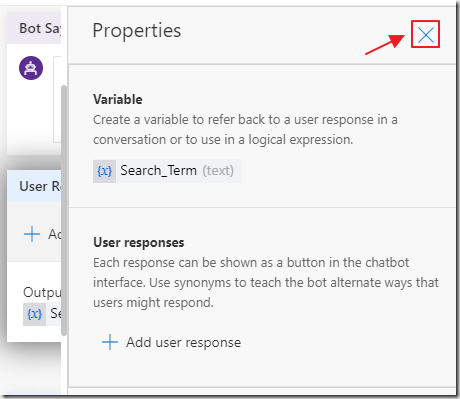
Close the Properties box.
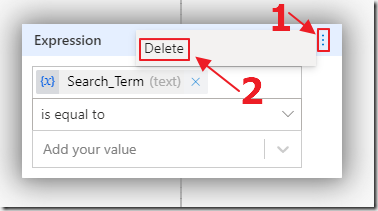
An Expression box will appear.
We don’t need it, delete it.
Note: It will fly up into the corner of the page, so you will have to select its properties and delete it again to permanently remove it.
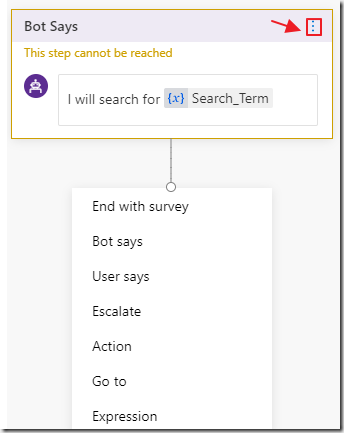
Return to the last item in the Topic.
Select Bot Says.
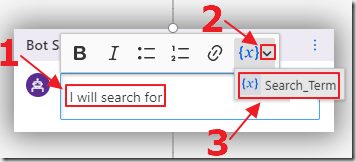
In the Bot Says box, type I will search for then select the dropdown next to the expression icon and select the Search_Term variable.
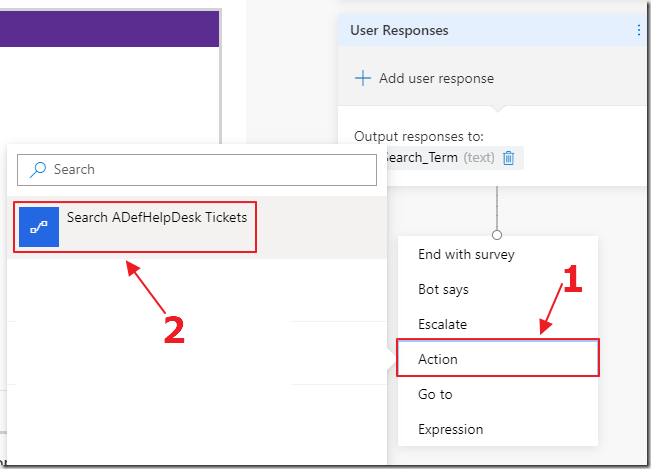
Select Action.
This will bring up the Microsoft Flow created earlier.
Select it.
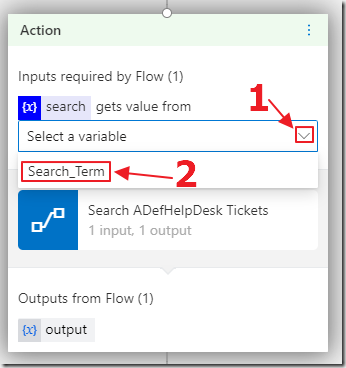
You have to set the search parameter the Microsoft Flow requires.
Select Search_Term from the dropdown.
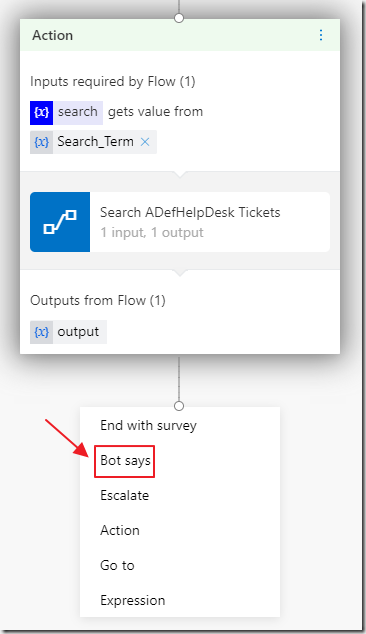
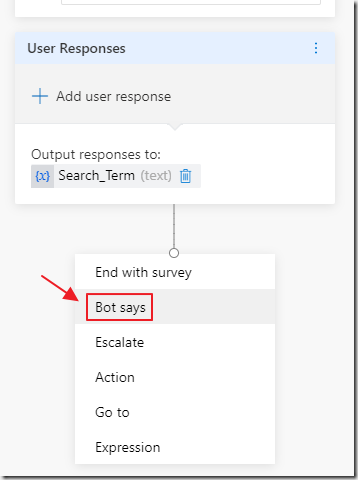
Select Bot Says.
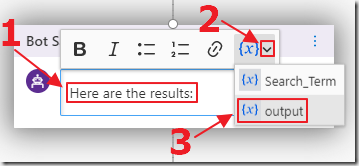
In the Bot Says box, type Here are the results: then select the dropdown next to the expression icon and select the output variable.
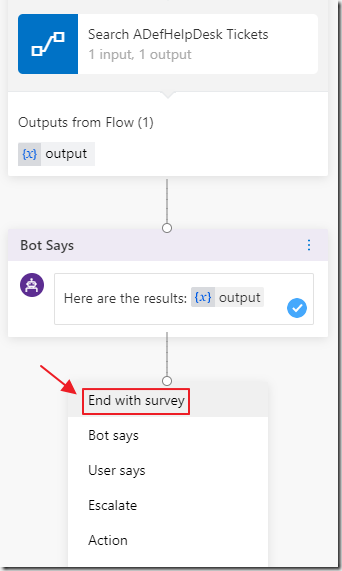
Select End with survey.
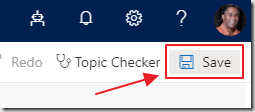
Save the bot.
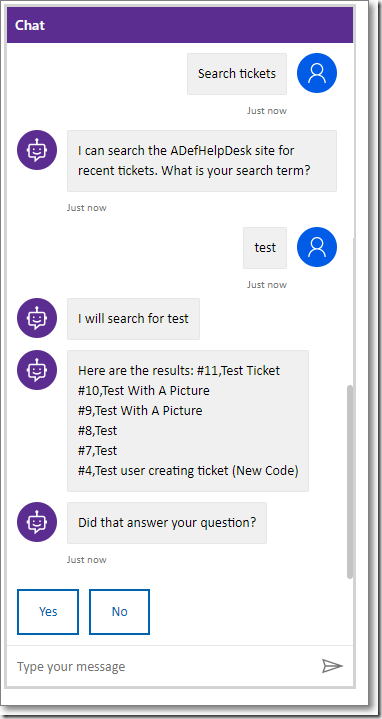
Test The Bot
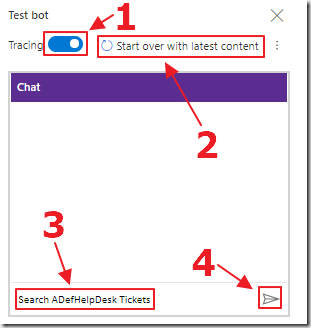
In the Test bot window, turn on Tracing, click Start over with latest content, type Search ADefHelpDesk Tickets (one of the trigger phrases) and click the send icon.
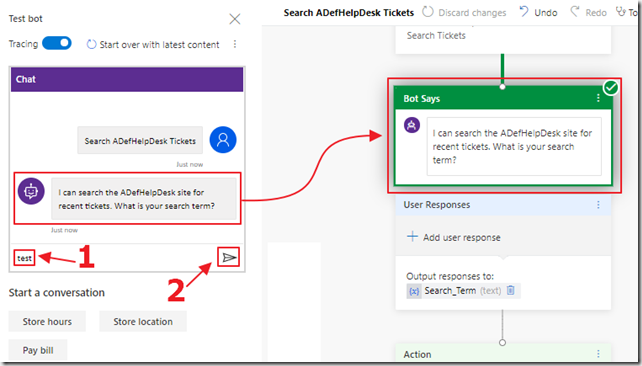
As you go through the conversation you will see the step highlighted in the Topic design screen.
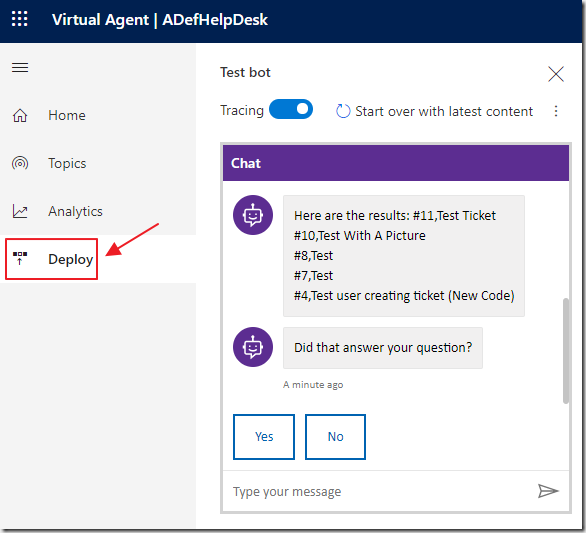
The bot is now complete.
Click the Deploy button to share it with your users.
Troubleshooting

If you try to save your Microsoft Flow and get an error similar to this:
Flow process '00000000-0000-0000-0000-000d000000' must be deactivated before flow can be updated.
It is because you did not turn off the Microsoft Flow before editing it.
To resolve this, click on Solutions…
Select the Solution that contains your Flow.
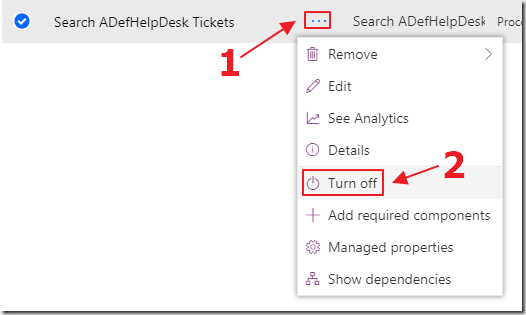
Click on the properties for the Flow and turn it off.
You need to always turn off the Flow before editing it.
You can then click on the name of the Flow to return to it.
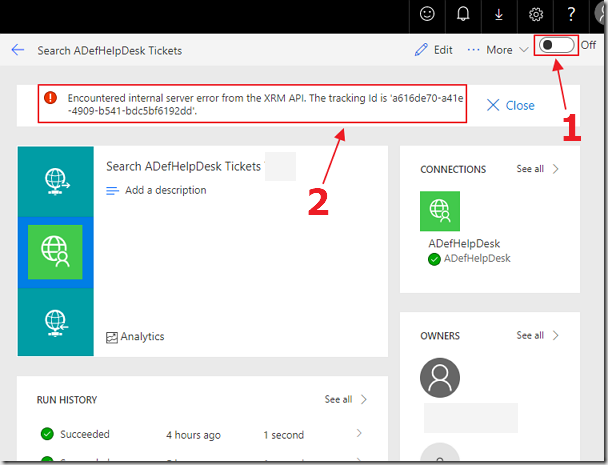
If you are on the overview screen of a Flow and try to turn it off or on using the selector on that page, you will get an error similar to the following:
Encountered internal server error from the XRM API. The tracking Id is '00000000-0000-0000-0000-000d000000'.
This is because you must turn the flow on and off using the Solutions page (described above).
Links
Dynamics 365 Virtual Agent for Customer Service
New! Dynamics 365 Virtual Agent for Customer Service is available for preview
Dynamics 365 Virtual Agent for Customer Service (Community Site)
Dynamics 365 Virtual Agent for Customer Service Documentation
Enhance bot capabilities with Microsoft Flow (Video)
Microsoft Flow
Microsoft Flow Custom Connector
Create a custom connector from scratch
Ultimate User Guide To Microsoft Flow
ADefHelpDesk