
9/5/2016 Webmaster
Using Images, Cards, Carousels, and Buttons In The Microsoft Bot Framework
Note: You can test out the sample Bot from this article in Skype using this link: https://join.skype.com/bot/d6a7af21-b56f-411f-b7cf-868d0fdbb1ba.
Implementing images in your Microsoft Bot Framework application adds a visual element to the interaction with your users.
You can easily pass a media attachment (image/audio/video/file) to a message using code such as this:
        activity.Attachments.Add(new Attachment()
        {
            ContentUrl = "http://aihelpwebsite.com/portals/0/Images/AIHelpWebsiteLogo_Large.png",
            ContentType = "image/png",
            Name = "AIHelpWebsiteLogo_Large.png"
        });
Depending on the channel used and the media type, a image will be displayed or a link will be displayed for the user to download the media element.
However, real power is provided when you use rich card attachments.
There are four card types:
Card Type Description Single or Carousel/List (multiple cards) Hero Card
A big image with text
Single or Carousel/List Thumbnail Card
A small image with text
Single or Carousel/List Receipt Card
An invoice or receipt
Single Sign-In Card
A user sign-in form
Single
Hero Card
A Hero Card and a Thumbnail Card differ only in the size of their image and card.
Each consists of the following properties:
Property Description Title
Title of the card
Text
Text to display on the card
Subtitle
A link for the title
Images
(actually only a single image)
Buttons
One or more buttons (in Skype only 5 buttons will display on a card. If you have more buttons, it will create two cards)
Tap
An action that is triggered when a user taps on the card (does not work in some Skype clients, so for Skype, use a hyperlink for the Subtitle property)
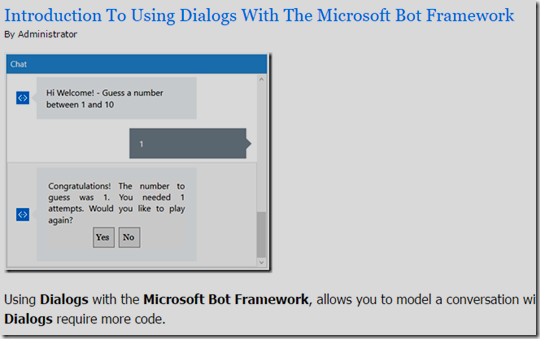
To demonstrate implementing a Hero Card, we will start with the code from the article: Introduction To Using Dialogs With The Microsoft Bot Framework (note: you will have to use Manage NuGet Packages in Visual Studio and update Microsoft.Bot.Builder to the latest stable version).
Also, we will make some small changes, such as making the number to guess from 1 to 5 rather than 1 to 10 so that it shows up well in Skype (because Skype will only display 5 buttons on a single card).
Open the project in Visual Studio.
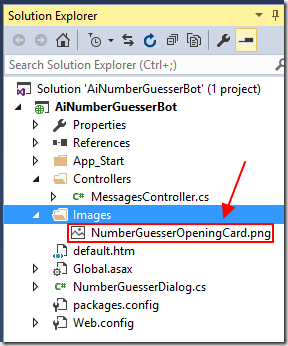
Add a new folder and call it Images.
Add the NumberGuesserOpeningCard.png file, (that you can get from the code for this article on the Downloads page), to the Images folder.
Open the MessagesController.cs file (in the Controllers directory), and add the following using statement to the top of the file:
using System.Collections.Generic;

Next, locate the else if (message.Type == ActivityTypes.ContactRelationUpdate) section in the HandleSystemMessage method.
This method fires when the Bot is added to the Contact list of a user.
Replace all the code in the section with the following code:
        // Construct a base URL for Image
        // To allow it to be found wherever the application is deployed
        string strCurrentURL =
            this.Url.Request.RequestUri.AbsoluteUri.Replace(@"api/messages", "");
        // Create a reply message
        Activity replyToConversation = message.CreateReply();
        replyToConversation.Recipient = message.From;
        replyToConversation.Type = "message";
        replyToConversation.Attachments = new List<Attachment>();
        // AttachmentLayout options are list or carousel
        replyToConversation.AttachmentLayout = "carousel";
        #region Card One
        // Full URL to the image
        string strNumberGuesserOpeningCard =
            String.Format(@"{0}/{1}",
            strCurrentURL,
            "Images/NumberGuesserOpeningCard.png");
        // Create a CardImage and add our image
        List<CardImage> cardImages1 = new List<CardImage>();
        cardImages1.Add(new CardImage(url: strNumberGuesserOpeningCard));
        // Create a CardAction to make the HeroCard clickable
        // Note this does not work in some Skype clients
        CardAction btnAiHelpWebsite = new CardAction()
        {
            Type = "openUrl",
            Title = "AiHelpWebsite.com",
            Value = "http://AiHelpWebsite.com"
        };
        // Finally create the Hero Card
        // adding the image and the CardAction
        HeroCard plCard1 = new HeroCard()
        {
            Title = "Ai Help Website - Number Guesser",
            Subtitle = "Hi Welcome! - Guess a number between 1 and 5",
            Images = cardImages1,
            Tap = btnAiHelpWebsite
        };
        // Create an Attachment by calling the
        // ToAttachment() method of the Hero Card
        Attachment plAttachment1 = plCard1.ToAttachment();
        // Add the Attachment to the reply message
        replyToConversation.Attachments.Add(plAttachment1);
        #endregion
        // Create a ConnectorClient and use it to send the reply message
        var connector =
            new ConnectorClient(new Uri(message.ServiceUrl));
        var reply =
            connector.Conversations.SendToConversationAsync(replyToConversation);
Save the file and hit F5 to run the application.
Connect to the Bot using the Bot Framework Emulator (Windows).
(for information on using the Emulator, see Creating a Hello World! Bot Using The Microsoft Bot Framework)
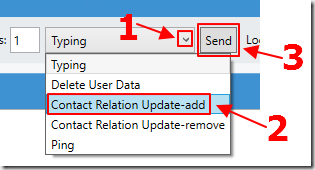
In the Emulator, invoke the Contact Relation Update-add event.
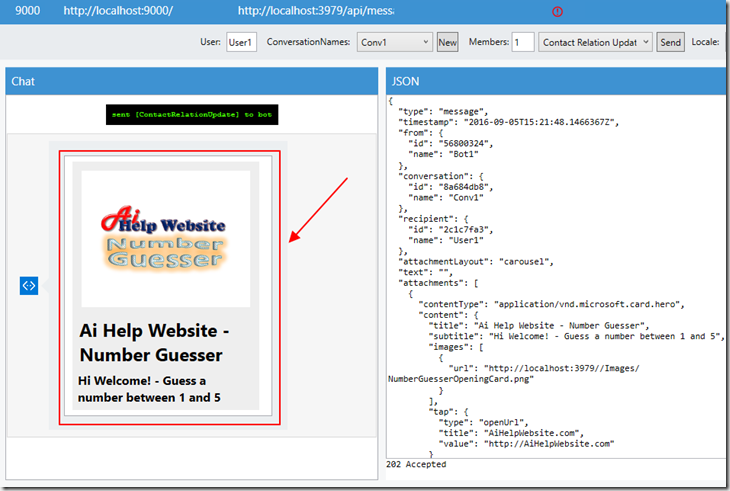
The Hero Card will display.
Clicking on the card will take you to the AiHelpWebsite.com website.
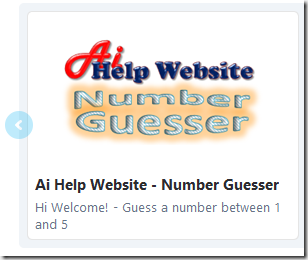
Carousel
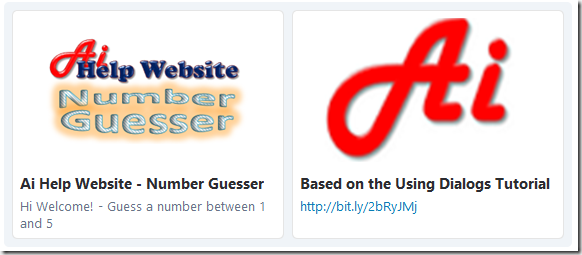
A carousel displays multiple cards (either Hero Cards or Thumbnail Cards) horizontally.
A List (this is the default layout for multiple cards), displays the cards vertically.
The image above shows what a carousel of two Hero Cards looks like in the Skype client.
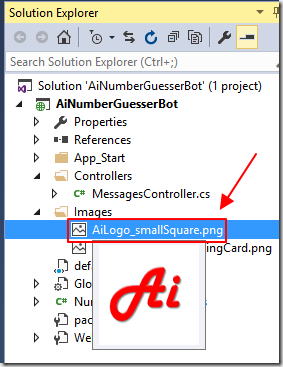
To implement this, first, add the AiLogo_smallSquare.png file, (that you can get from the code for this article on the Downloads page), to the Images folder.
Next, add the following code to the HandleSystemMessage method (above the var connector = new ConnectorClient(new Uri(message.ServiceUrl)); line):
        #region Card Two
        string strAiLogo_smallSquare =
            String.Format(@"{0}/{1}",
            strCurrentURL,
            "Images/AiLogo_smallSquare.png");
        List<CardImage> cardImages2 = new List<CardImage>();
        cardImages2.Add(new CardImage(url: strAiLogo_smallSquare));
        // CardAction to make the HeroCard clickable
        CardAction btnTutorial = new CardAction()
        {
            Type = "openUrl",
            Title = "http://bit.ly/2bRyJMj",
            Value = "http://bit.ly/2bRyJMj"
        };
        HeroCard plCard2 = new HeroCard()
        {
            Title = "Based on the Using Dialogs Tutorial",
            Subtitle = "http://bit.ly/2bRyJMj",
            Images = cardImages2,
            Tap = btnTutorial
        };
        Attachment plAttachment2 = plCard2.ToAttachment();
        replyToConversation.Attachments.Add(plAttachment2);
        #endregion
Save the file, run the application, and connect to it in the Emulator.
In the Emulator, invoke the Contact Relation Update-add event.
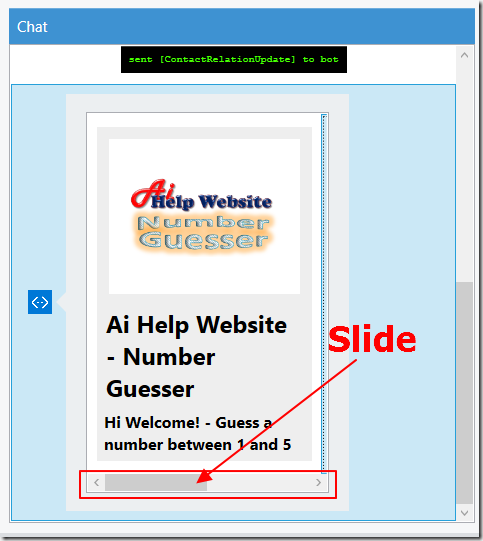
The first card will show, but you will now see a slider.
Slide it to the right.

You will see the second Hero Card.
In Skype, the Subtitle property will display as a hyperlink and be clickable.
Rich Card Attachments In Dialogs
There are additional challenges when implementing rich card attachments in Dialogs.
Primarily, the biggest challenge Is that, inside the Dialog class, you do not have access to the base URL of the application (to determine where your images are).
We can address this by using the Bot State Service.
Open the the MessagesController.cs file:
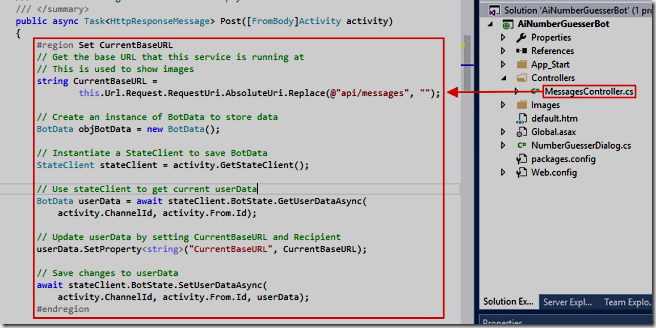
Add the following code to the top of the Post method:
        #region Set CurrentBaseURL
        // Get the base URL that this service is running at
        // This is used to show images
        string CurrentBaseURL =
                this.Url.Request.RequestUri.AbsoluteUri.Replace(@"api/messages", "");
        // Create an instance of BotData to store data
        BotData objBotData = new BotData();
        // Instantiate a StateClient to save BotData
        StateClient stateClient = activity.GetStateClient();
        // Use stateClient to get current userData
        BotData userData = await stateClient.BotState.GetUserDataAsync(
            activity.ChannelId, activity.From.Id);
        // Update userData by setting CurrentBaseURL and Recipient
        userData.SetProperty<string>("CurrentBaseURL", CurrentBaseURL);
        // Save changes to userData
        await stateClient.BotState.SetUserDataAsync(
            activity.ChannelId, activity.From.Id, userData);
        #endregion
This will store the CurrentBaseURL and the Recipient using the Bot State Service so that the values can be retrieved in the Dialog class.

Open the NumberGuesserDialog.cs file.
(this file contains the NumberGuesserDialog class that is instantiated in the Post method of the MessagesController class. You can read more about it here: Introduction To Using Dialogs With The Microsoft Bot Framework)
Add this above the namespace:
using System.Collections.Generic;
Add this to the top of the class:
string strBaseURL;
This will provide a global variable (that will be automatically serialized and persisted between calls) to store the Base URL.
Add the following code to the top of the MessageReceivedAsync method:
    // Set BaseURL
    context.UserData.TryGetValue<string>(
        "CurrentBaseURL", out strBaseURL);
This will retrieve the value of CurrentBaseURL that was stored in Bot State Service in the MessagesController class and store it in the strBaseURL global variable.
Add the following Utility method to the class. This method will create 5 CardAction buttons that will be attached to the Hero Card that we will create later:
    #region private static List<CardAction> CreateButtons()
    private static List<CardAction> CreateButtons()
    {
        // Create 5 CardAction buttons
        // and return to the calling method
        List<CardAction> cardButtons = new List<CardAction>();
        for (int i = 1; i < 6; i++)
        {
            string CurrentNumber = Convert.ToString(i);
            CardAction CardButton = new CardAction()
            {
                Type = "imBack",
                Title = CurrentNumber,
                Value = CurrentNumber
            };
            cardButtons.Add(CardButton);
        }
        return cardButtons;
    }
    #endregion
The buttons are set to the Type “imBack” that makes the button (CardAction) simply post the value (in this case the button number) back to the Bot.
Create The Hero Card In The Dialog Class

We will now display a Hero Card with 5 buttons in the Dialog class.
First add the NumberGuesserCard.png file, (that you can get from the code for this article on the Downloads page), to the Images folder.
Next, find the following code in the MessageReceivedAsync method:
    // See if a number was passed
    if (!int.TryParse(message.Text, out intGuessedNumber))
    {
        // A number was not passed
        await context.PostAsync("Hi Welcome! - Guess a number between 1 and 10");
        context.Wait(MessageReceivedAsync);
    }
Replace it with the following code:
        // See if a number was passed
        if (!int.TryParse(message.Text, out intGuessedNumber))
        {
            // A number was not passed
            // Create a reply Activity
            Activity replyToConversation = (Activity)context.MakeMessage();
            replyToConversation.Recipient = replyToConversation.Recipient;
            replyToConversation.Type = "message";
            string strNumberGuesserCard =
                String.Format(@"{0}/{1}",
                strBaseURL,
                "Images/NumberGuesserCard.png");
            List<CardImage> cardImages = new List<CardImage>();
            cardImages.Add(new CardImage(url: strNumberGuesserCard));
            // Create the Buttons
            // Call the CreateButtons utility method
            List<CardAction> cardButtons = CreateButtons();
            // Create the Hero Card
            // Set the image and the buttons
            HeroCard plCard = new HeroCard()
            {
                Images = cardImages,
                Buttons = cardButtons,
            };
            // Create an Attachment by calling the
            // ToAttachment() method of the Hero Card
            Attachment plAttachment = plCard.ToAttachment();
            // Attach the Attachment to the reply
            replyToConversation.Attachments.Add(plAttachment);
            // set the AttachmentLayout as 'list'
            replyToConversation.AttachmentLayout = "list";
            // Send the reply
            await context.PostAsync(replyToConversation);
            context.Wait(MessageReceivedAsync);
        }
Save the file, hit F5 to run the project, and connect to it in the Emulator.
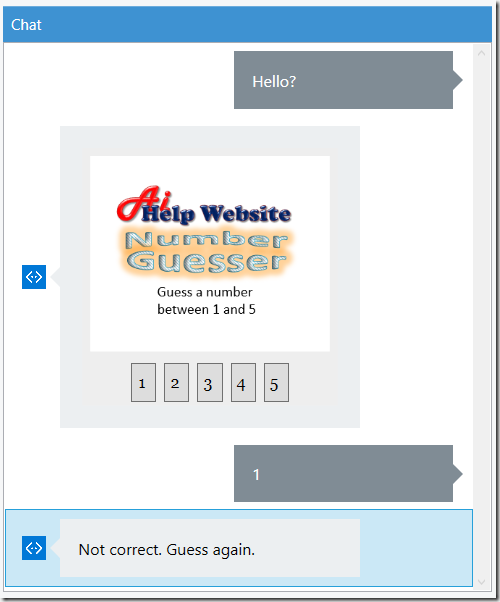
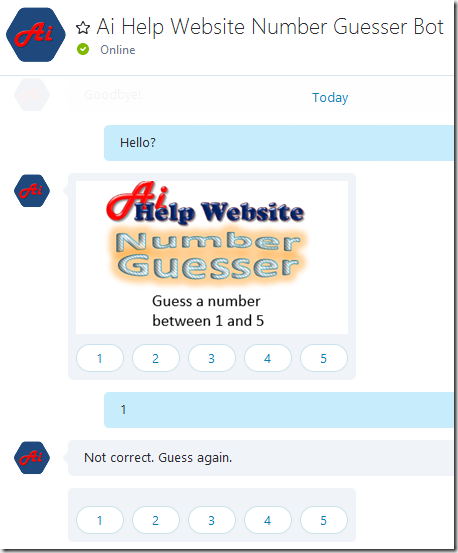
The Bot will now display a image and buttons.
We can either click one of the buttons, or enter a number, to play the game.
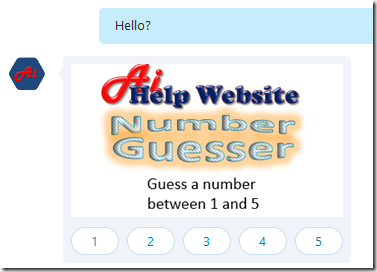
The following image displays what it looks like in Skype:
Creating A Re-Usable Hero Card
There are a few more places we need to display the Hero Card with the buttons.
We will want to create a re-usable Hero Card.
This Hero Card will not have an image, only the buttons.
First, add the following utility method to the Dialog class:
    #region private static Activity ShowButtons(IDialogContext context, string strText)
    private static Activity ShowButtons(IDialogContext context, string strText)
    {
        // Create a reply Activity
        Activity replyToConversation = (Activity)context.MakeMessage();
        replyToConversation.Text = strText;
        replyToConversation.Recipient = replyToConversation.Recipient;
        replyToConversation.Type = "message";
        // Call the CreateButtons utility method
        // that will create 5 buttons to put on the Here Card
        List<CardAction> cardButtons = CreateButtons();
        // Create a Hero Card and add the buttons
        HeroCard plCard = new HeroCard()
        {
            Buttons = cardButtons
        };
        // Create an Attachment
        // set the AttachmentLayout as 'list'
        Attachment plAttachment = plCard.ToAttachment();
        replyToConversation.Attachments.Add(plAttachment);
        replyToConversation.AttachmentLayout = "list";
        // Return the reply to the calling method
        return replyToConversation;
    }
    #endregion
Note that it calls the CreateButtons utility method that we created earlier.
Now, locate the following code:
        // A number was passed
        // See if it was the correct number
        if (intGuessedNumber != this.intNumberToGuess)
        {
            // The number was not correct
            this.intAttempts++;
            await context.PostAsync("Not correct. Guess again.");
            context.Wait(MessageReceivedAsync);
        }
Replace it with:
        // A number was passed
        // See if it was the correct number
        if (intGuessedNumber != this.intNumberToGuess)
        {
            // The number was not correct
            this.intAttempts++;
            // Create a response
            // This time call the ** ShowButtons ** method
            Activity replyToConversation =
                ShowButtons(context, "Not correct. Guess again.");
            await context.PostAsync(replyToConversation);
            context.Wait(MessageReceivedAsync);
        }
The code will now call the ShowButtons method that will return the Hero Card.
Finally, find the following code:
    // Start a new Game
    await context.PostAsync("Hi Welcome! - Guess a number between 1 and 10");
    context.Wait(MessageReceivedAsync);
Replace it with:
        // Start a new Game
        // Create a response
        // This time call the ** ShowButtons ** method
        Activity replyToConversation =
            ShowButtons(context, "Hi Welcome! - Guess a number between 1 and 5");
        await context.PostAsync(replyToConversation);
        context.Wait(MessageReceivedAsync);
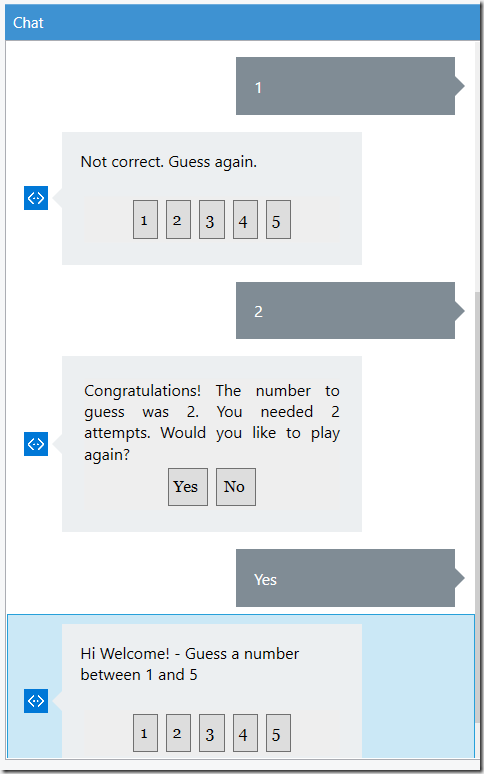
The Bot will now display the Hero Card, with only the buttons, in each situation where we called the utility method.
Microsoft Links
Bot Framework Forum (stack overflow)
Download
You can download the code from the Download page