1/11/2020 Webmaster
Using The Microsoft Bot Framework Composer
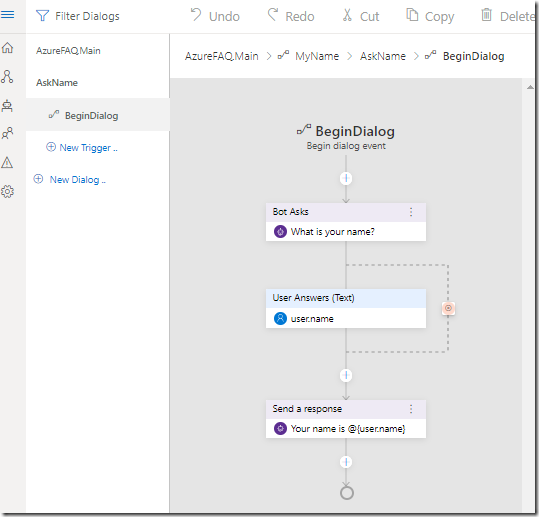
You can visually create Bots using the Microsoft Bot Framework Composer.
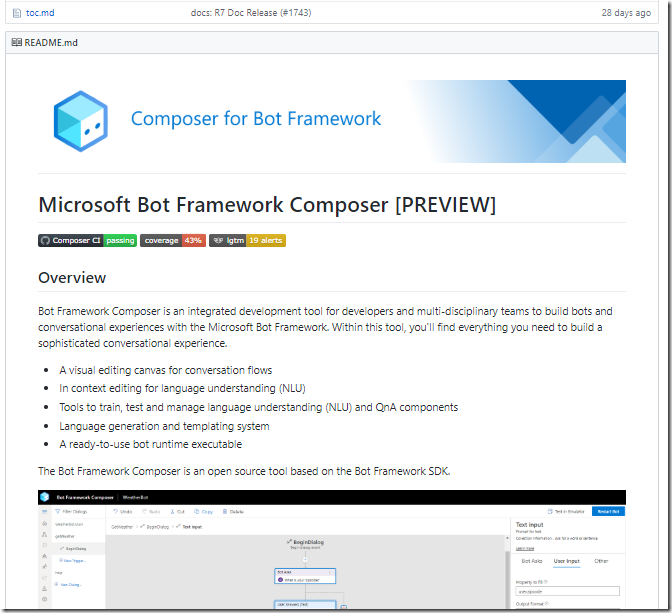
The Microsoft Bot Framework Composer is a GitHub project that you download and run locally.
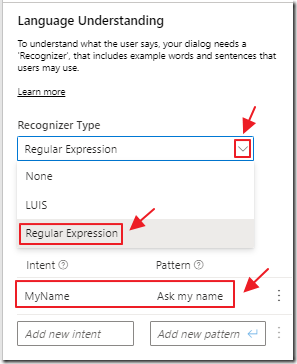
Bots are created by defining intents…
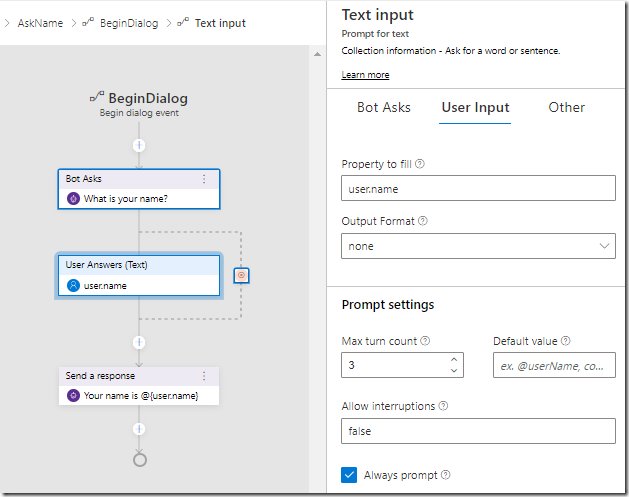
Intents can be mapped to dialogs that you can visually design.
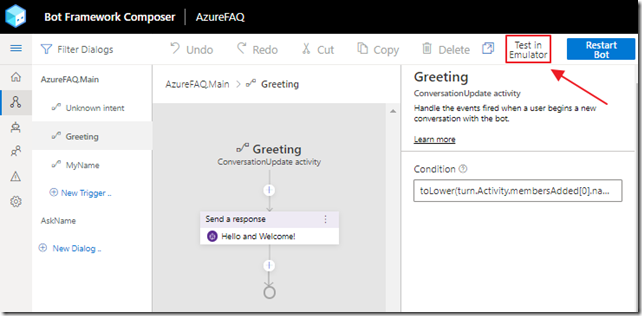
You can launch the the Bot Framework Emulator from the application.
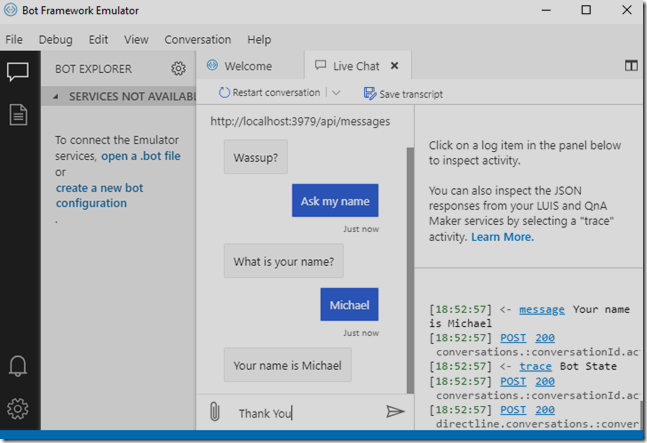
The emulator allows you to test and debug your Bot.
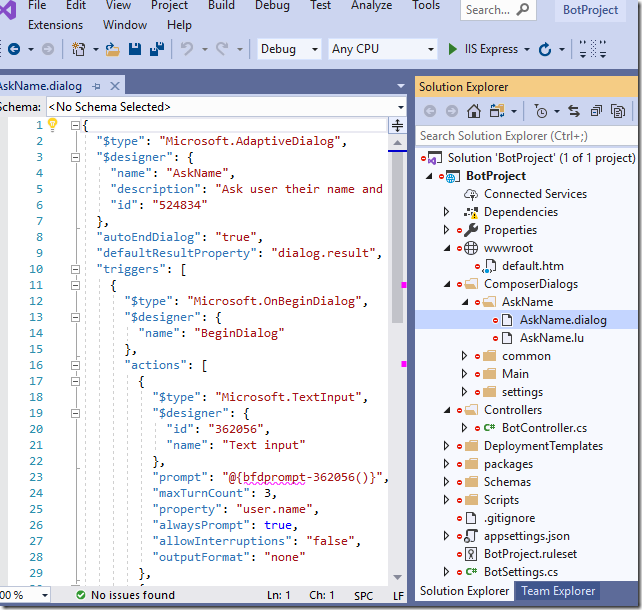
The code created is a normal Visual Studio project that you can execute, debug, enhance, and deploy like any other Bot Framework SDK v4 project.
Requirements
- Visual Studio 2019 (or higher)
- Microsoft Bot Framework Composer
- Bot Framework Emulator
- A Microsoft Azure Subscription (to use the QnA Maker and to deploy to Azure)
Install The Microsoft Bot Framework Composer
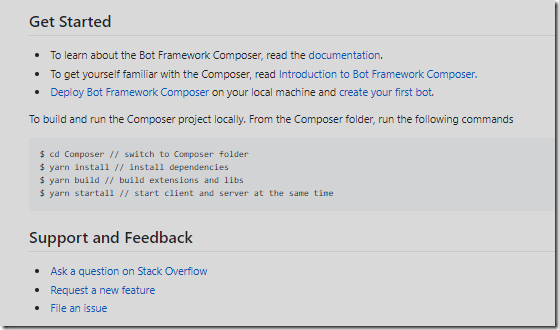
To get started, download and install the Microsoft Bot Framework Composer using the directions located here:
https://github.com/microsoft/BotFramework-Composer/blob/stable/docs/setup-yarn.md
Also, to test your Bot, install the Microsoft Bot Framework Emulator:
https://github.com/Microsoft/BotFramework-Emulator/releases/tag/v4.7.0
Create The Bot
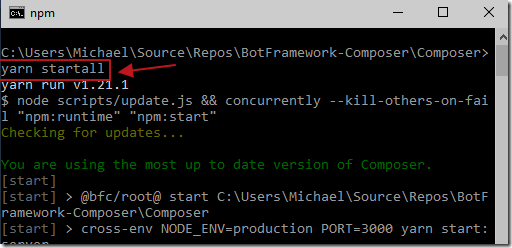
You start the application by executing the command:
yarn startall
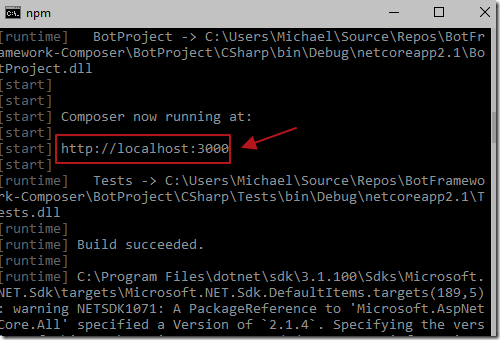
This will launch the application at http://localhost:3000
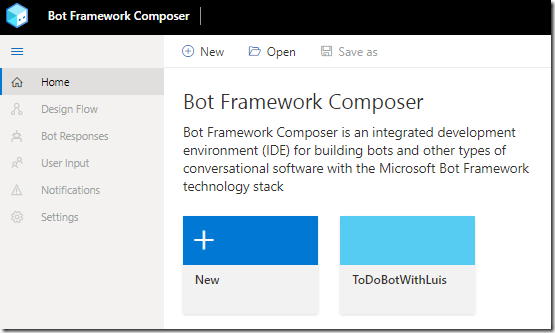
Opening your web browser, and navigating to that location, will bring up the application.
Create The Project
To create a new project, click the New button.
Select Create from scratch and click Next.
Give the Bot a name and click Next.
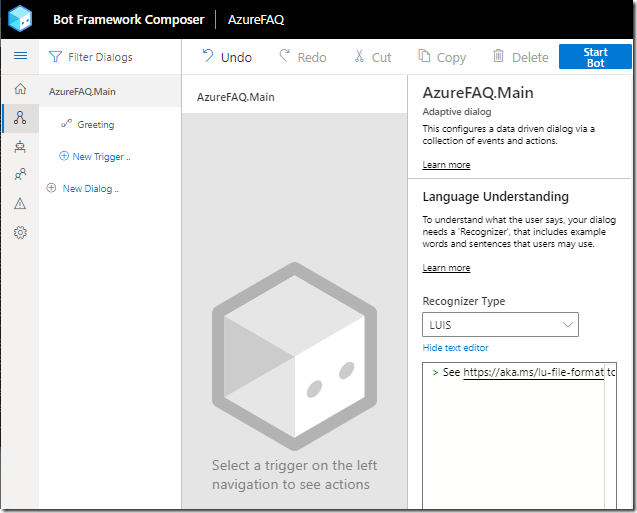
The Bot will be created.
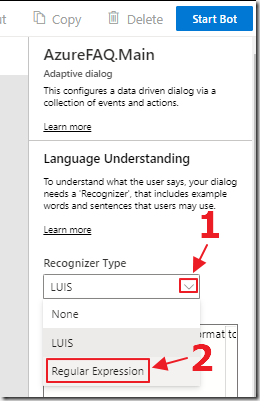
In the Language Understanding section, switch to Regular Expression.
Say Hello
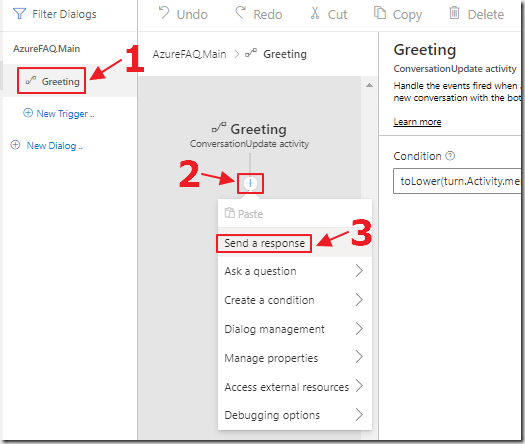
Click on the Greeting trigger to open it.
Click on the + to add an activity and select Send a response.
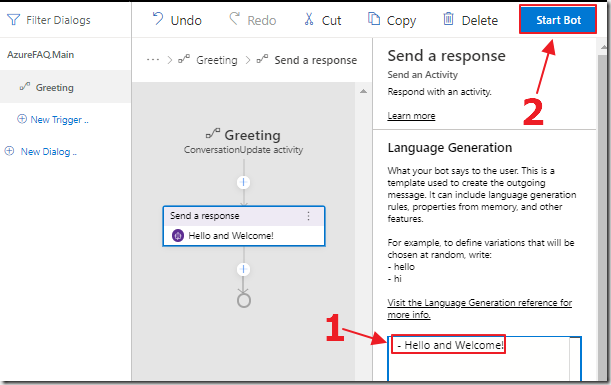
In the Language Generation window that opens, enter – Hello and Welcome! and then click the Start Bot button.

The Test in Emulator button will show.
Click it.
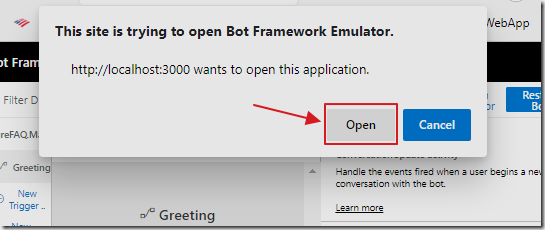
Click Open.
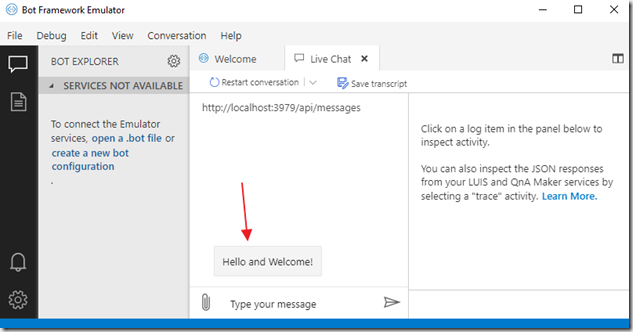
The Microsoft Bot Framework Emulator will open, and it will display the greeting.
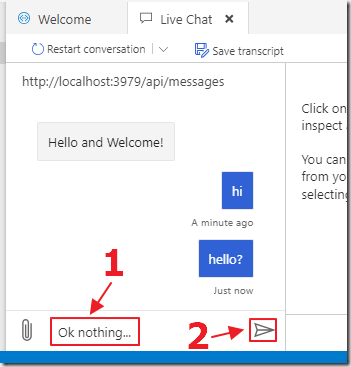
We can enter messages to the Bot, but, it wont respond because we have only created a greeting at this point.
Creating The Ask My Name Dialog
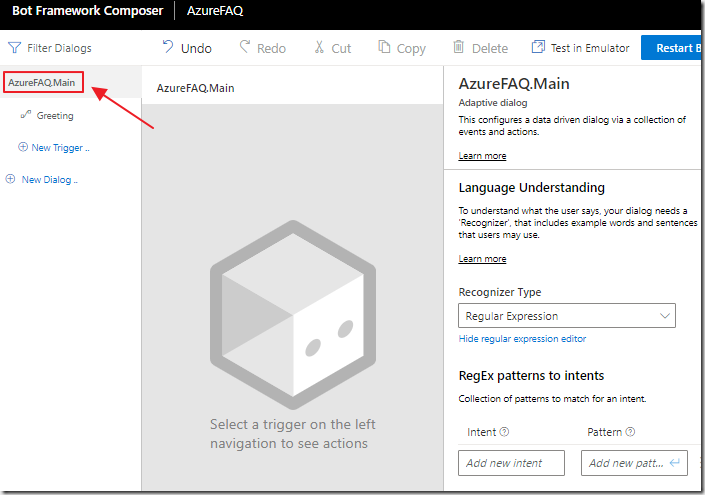
Return to the Bot Framework Composer.
Click the name of the project to navigate to the main menu.
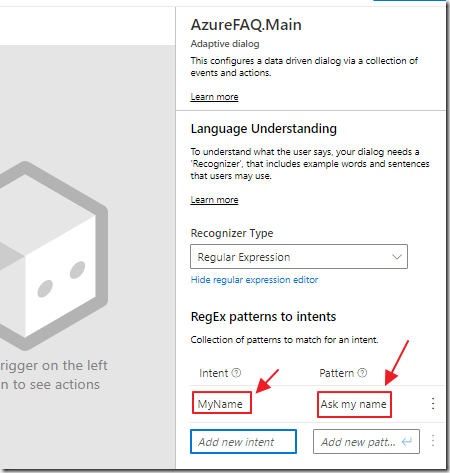
In the RegEx patterns to intents section, enter MyName for Intent and Ask my name for Pattern.
Press thee return key after you type Ask my name.
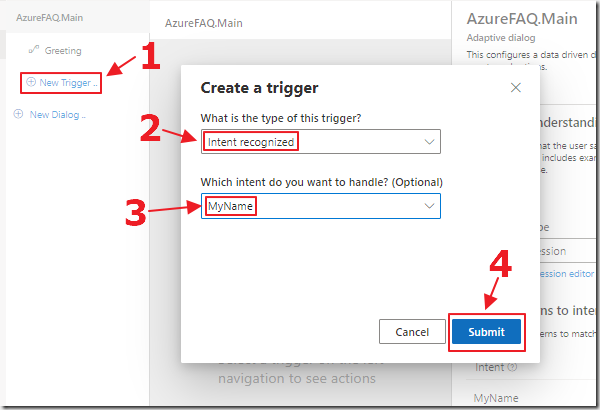
Click the New Trigger link.
This will open the Create a trigger dialog.
Select Intent recognized for trigger type and MyName for the handle.
Click the Submit button.
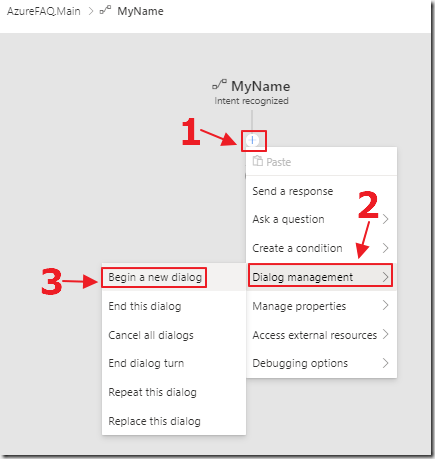
Create a new action by selecting Dialog management, then Begin a new dialog.
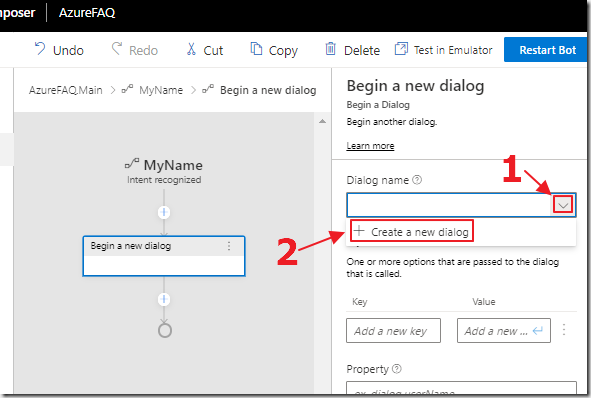
On the Dialog name dropdown, select Create a new dialog.
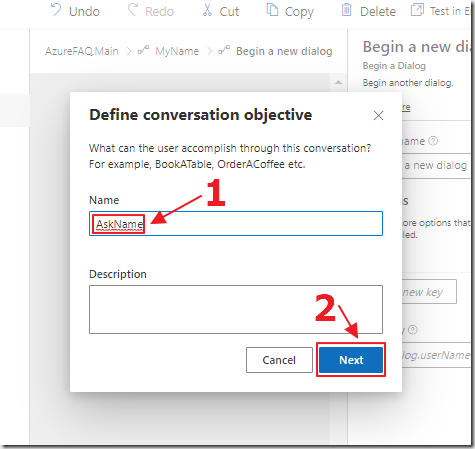
Name the dialog AskName and click the Next button.
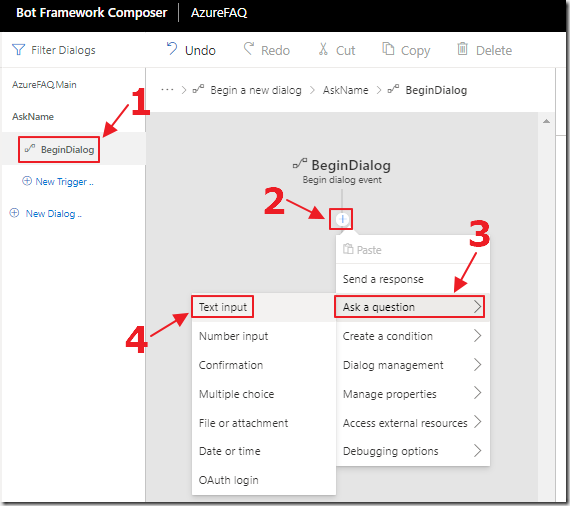
Select the BeginDialog event and create a new action by selecting Ask a question and then Text input.
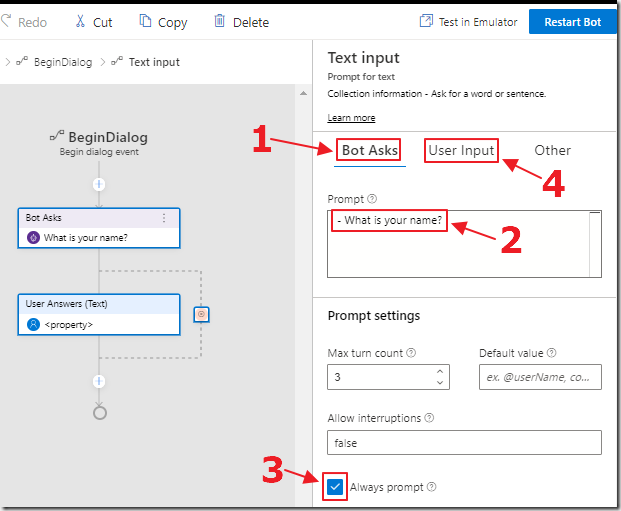
For the Prompt on the Bot Asks tab, enter –What is your name?
Ensure Always prompt is checked.
Click the User Input tab.
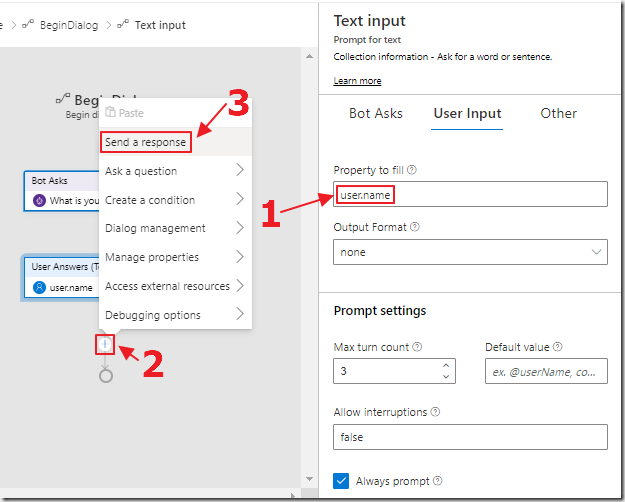
On the User Input tab, enter user.name for Property to fill.
Add a new action of type Send a response.
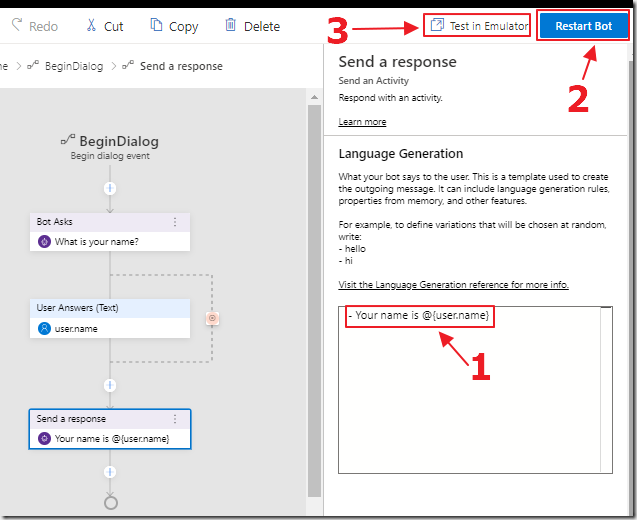
In the Language Generation section for the Send a response action, enter – Your name is @{user.name}
Click the Restart Bot button, then the Test in Emulator button, to test the Bot in the Emulator.
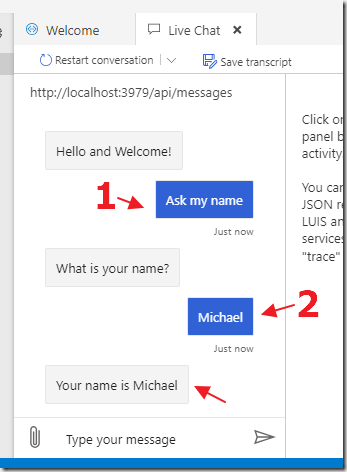
When the emulator opens, we can type Ask my name and the Bot will respond and ask our name.
After we enter our name, the Bot will repeat our name back to us.
Use QnA Maker
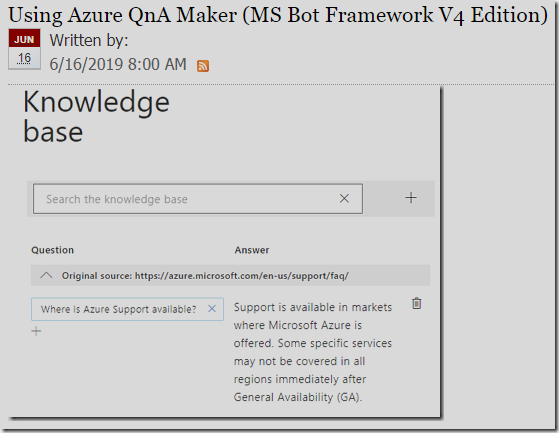
Follow the steps in this article (Using Azure QnA Maker (MS Bot Framework V4 Edition)) to create a QnA Maker knowledgebase.
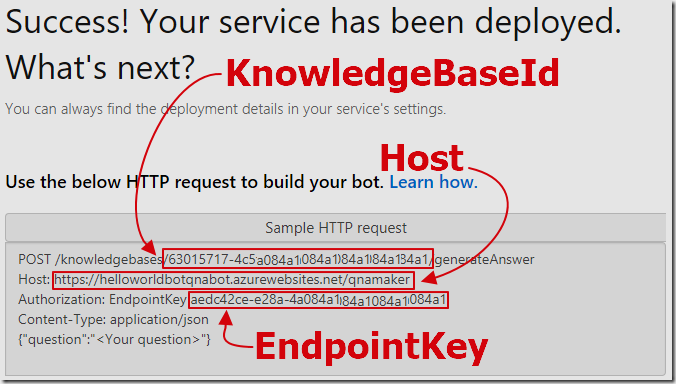
The article will show you how to get your settings.
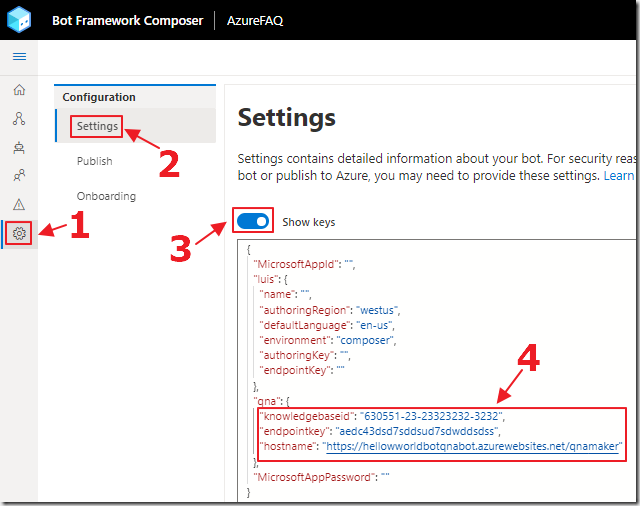
In the Bot Framework Composer, select the Settings menu and enter your QnA Maker settings.
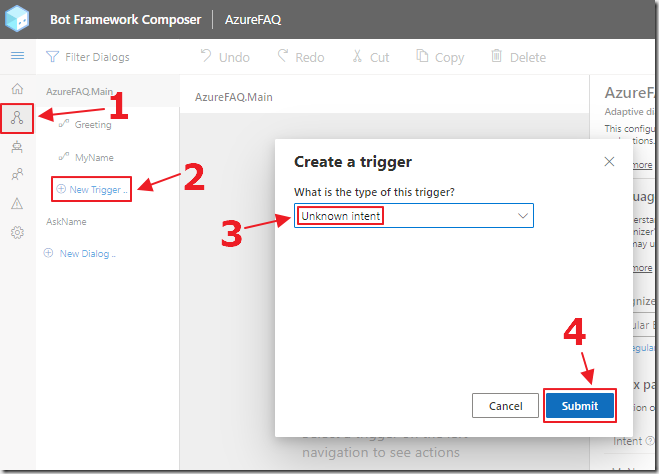
Navigate back to the main Bot screen, and create a New Trigger of type Unknown intent.
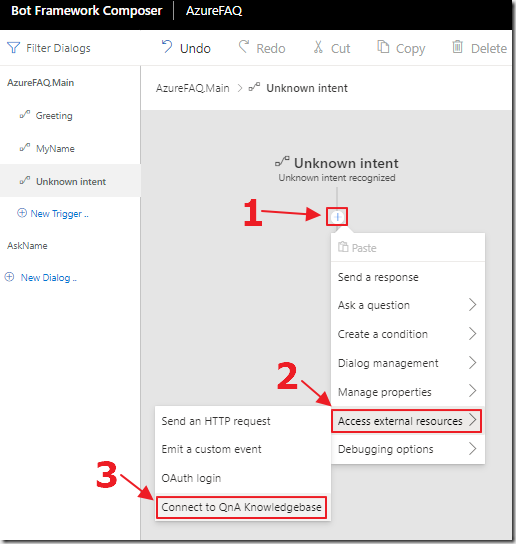
Create a new action to Connect to QnA Knowledgebase.
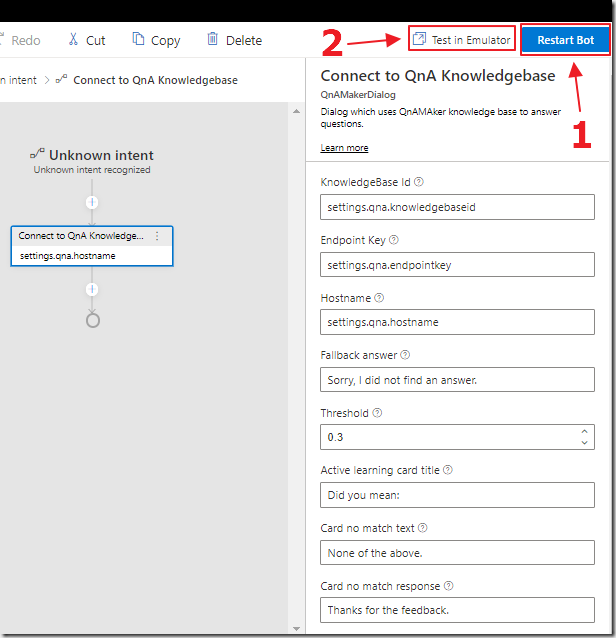
Click Restart Bot and then Test in Emulator.
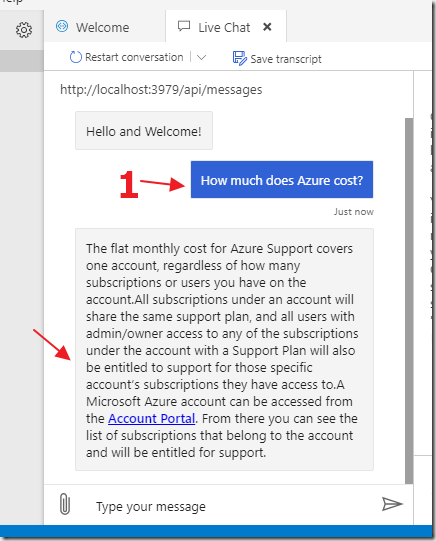
In the Emulator, we can see that any entry that does not raise one of the defined triggers, will be passed through the QnA Knowledgebase.
