
6/11/2017 Webmaster
Microsoft Cognitive Custom Vision Service .Net Core Angular 4 Application (Part One)
You can easily create a .Net Core Angular 4 application that consumes your Custom Vision Service machine learning model.
Microsoft’s Custom Vision Service allows you to upload sample images, classify them, train a model, and then use that model to evaluate and automatically classify your images.
It also allows you to add additional images, correct, and re-train the model. All features can be performed and invoked using the REST based API so you can incorporate all functionality into your custom programs.
This article is the second in a planned series of tutorials:
- Custom Vision Application – Create a Custom Vision project that classifies images and allows you to upload images to be classified.
- (this article) Angular 4 Application (Part One) – Creating an application that allows you to upload an image and have it classified.
- Angular 4 Application (Part Two) – Upload new training images, tag them, and re-train the model.
The Application
To run the sample code (available on the Downloads page of this site), we first need to obtain the Prediction URL and keys for the application (created in the first tutorial of the series: Microsoft Cognitive Custom Vision Service (Tutorial Series)).
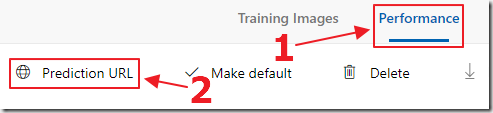
We log into the Custom Vision website, select our application, then select Performance and Prediction URL.
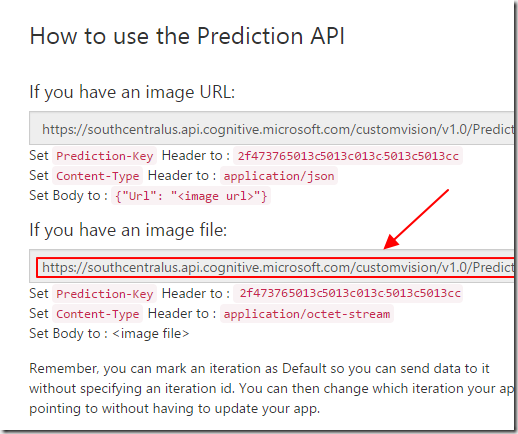
We copy the URL (for an image file rather than for an image URL).
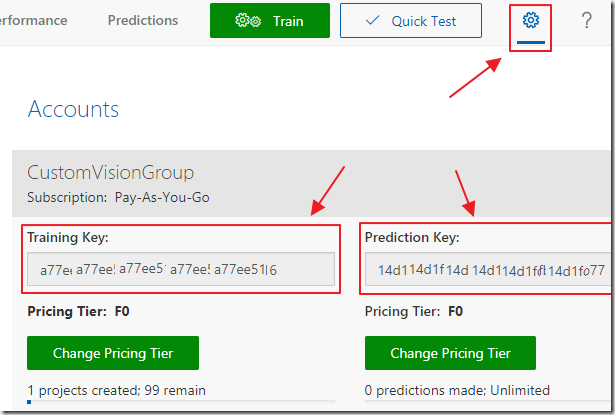
We now select the Gear icon and copy the Training and Prediction keys.
(note: The Training key will not be used in this tutorial, but it will be used in the next tutorial in this series)
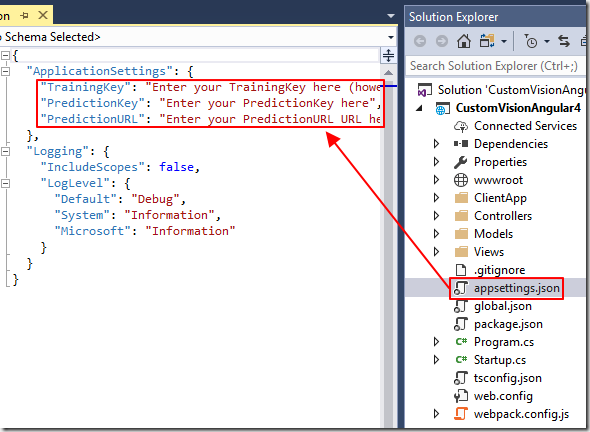
Next, we open the .Net Core Angular 4 application (available on the Downloads page of this site), in Visual Studio 2017 (or higher), and update and save the values in the appsettings.json file.
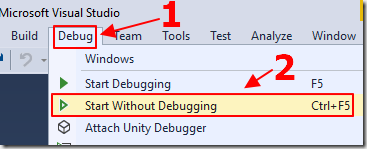
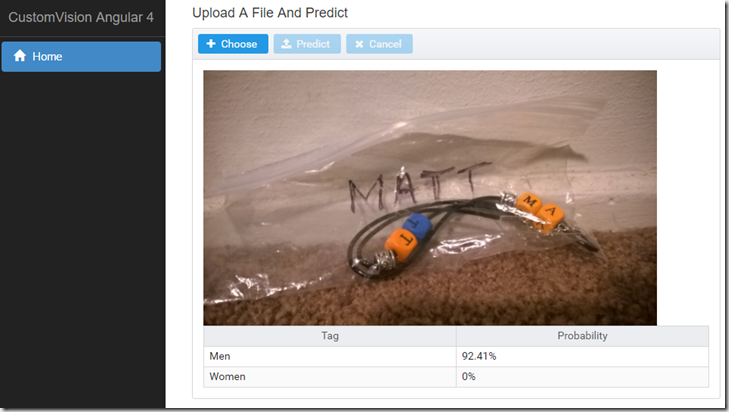
We run the application.

We click the Choose button.
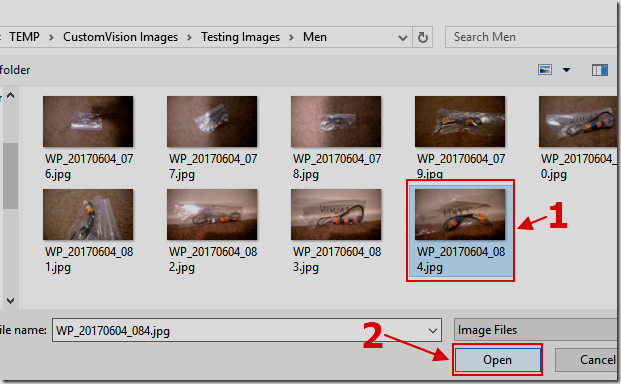
We select one of our testing images.
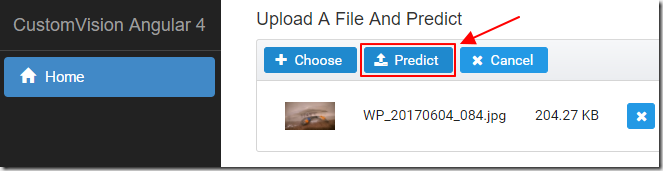
The Predict button will now be enabled.
We now click it.

The image will be sent to the Custom Vision API and the prediction results will be displayed.
Creating The Application
We create a .Net JavaScriptServices Angular 4 (with PrimeNG) application by following the directions in the following article:
Upgrading JavaScriptServices and PrimeNG From Angular 2 to Angular 4+
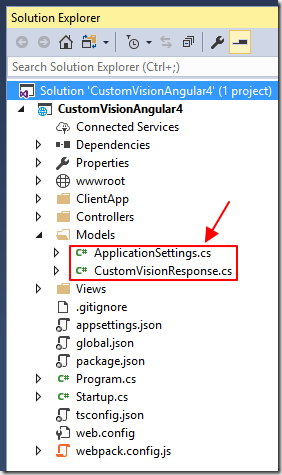
After adding our application settings to the appsettings.json file (covered earlier), we create a Models folder and create two files using the following code:
ApplicationSettings.cs (used to hold application settings):
using System;
using System.Collections.Generic;
using System.Linq;
namespace CustomVisionAngular4
{
    public class ApplicationSettings
    {
        public string TrainingKey { get; set; }
        public string PredictionKey { get; set; }
        public string PredictionURL { get; set; }
    }
}
CustomVisionResponse.cs (used to hold the prediction results from the call to the Custom Vision API that are then passed to the Angular code):
using System;
using System.Collections.Generic;
using System.Linq;
using System.Threading.Tasks;
namespace CustomVisionAngular4.Models
{
    public class CustomVisionResponse
    {
        public string Id { get; set; }
        public string Project { get; set; }
        public string Iteration { get; set; }
        public string Created { get; set; }
        public List<Prediction> Predictions { get; set; }
    }
    public class Prediction
    {
        public string TagId { get; set; }
        public string TagName { get; set; }
        public string Probability { get; set; }
    }
}
We also add the following code to the Configuration method in the Startup.cs file:
    // Get the ApplicationSettings
    services.Configure<ApplicationSettings>(
        Configuration.GetSection("ApplicationSettings"));
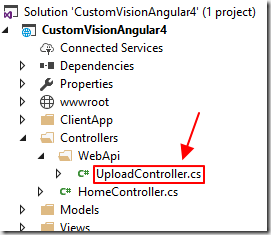
We need to create a server side Web API method to receive the image file and return prediction results.
We create a WebApi folder under the Controllers folder and create a UploadController.cs file using the following code:
using CustomVisionAngular4.Models;
using Microsoft.AspNetCore.Http;
using Microsoft.AspNetCore.Mvc;
using Microsoft.Extensions.Options;
using Newtonsoft.Json;
using System;
using System.Collections.Generic;
using System.Net.Http;
using System.Net.Http.Headers;
namespace CustomVisionAngular4.Controllers
{
    [Route("api/upload")]
    public class UploadController : Controller
    {
        private string _TrainingKey;
        private string _PredictionKey;
        private string _PredictionURL;
        public UploadController(IOptions<ApplicationSettings> ApplicationSettings)
        {
            // Get the values from the appsettings.json file
            _TrainingKey = ApplicationSettings.Value.TrainingKey;
            _PredictionKey = ApplicationSettings.Value.PredictionKey;
            _PredictionURL = ApplicationSettings.Value.PredictionURL;
        }
        // api/Upload
        [HttpPost]
        public IActionResult Index(ICollection<IFormFile> files)
        {
            CustomVisionResponse FinalCustomVisionResponse =
                new CustomVisionResponse();
            if (!Request.HasFormContentType)
            {
                return BadRequest();
            }
            // Get the Form
            var form = Request.Form;
            // Process the first file passed
            // (only one file should be passed)
            var file = form.Files[0];
            // Process file
            using (var readStream = file.OpenReadStream())
            {
                // Create a HttpClient to make the request
                using (HttpClient client = new HttpClient())
                {
                    // Set Prediction Key in the request headers
                    client.DefaultRequestHeaders.Add("Prediction-Key", _PredictionKey);
                    // Serialize Request
                    MultipartFormDataContent _multiPartContent =
                        new MultipartFormDataContent();
                    StreamContent _imageData =
                        new StreamContent(readStream);
                    _imageData.Headers.ContentType =
                        new MediaTypeHeaderValue("application/octet-stream");
                    ContentDispositionHeaderValue _contentDispositionHeaderValue =
                        new ContentDispositionHeaderValue("form-data");
                    _contentDispositionHeaderValue.Name = "imageData";
                    _contentDispositionHeaderValue.FileName = file.Name;
                    _imageData.Headers.ContentDisposition = _contentDispositionHeaderValue;
                    _multiPartContent.Add(_imageData, "imageData");
                    // Make the request to the Custom Vision API
                    HttpResponseMessage response =
                        client.PostAsync(_PredictionURL, _multiPartContent).Result;

                    // Get the response
                    string ResponseContent = response.Content.ReadAsStringAsync().Result;
                    // Convert the response to the CustomVisionResponse object
                    CustomVisionResponse TempCustomVisionResponse =
                        JsonConvert.DeserializeObject<CustomVisionResponse>(ResponseContent);
                    // Create the FinalCustomVisionResponse and set the main values to
                    // the values in TempCustomVisionResponse
                    FinalCustomVisionResponse.Id = TempCustomVisionResponse.Id;
                    FinalCustomVisionResponse.Created = TempCustomVisionResponse.Created;
                    FinalCustomVisionResponse.Iteration = TempCustomVisionResponse.Iteration;
                    FinalCustomVisionResponse.Project = TempCustomVisionResponse.Project;
                    FinalCustomVisionResponse.Predictions = new List<Prediction>();
                    // The Predictions collection contains probabilities that are
                    // in scientific notation that need to be converted to a percentage
                    foreach (var Prediction in TempCustomVisionResponse.Predictions)
                    {
                        // Make a Prediction object and set it to
                        // the values in TempCustomVisionResponse.Predictions
                        Prediction objPrediction = new Prediction();
                        objPrediction.TagId = Prediction.TagId;
                        objPrediction.TagName = Prediction.TagName;
                        // Convert the Probability to a decimal
                        Decimal dProbability = 0;
                        Decimal.TryParse(Prediction.Probability, out dProbability);
                        // Convert the decimal to a percentage
                        objPrediction.Probability = dProbability.ToString("#0.##%");
                        // Add the Prediction object to the Predictions
                        FinalCustomVisionResponse.Predictions.Add(objPrediction);
                    }
                }
            }
            // Return the CustomVisionResponse to the Angular application
            return Ok(FinalCustomVisionResponse);
        }
    }
}
Angular Code
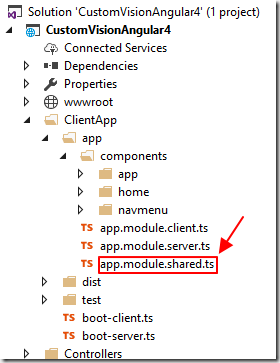
We alter the app.module.shared.ts file to the following (to register only our Home component, the NavMenu component, and PrimeNG):
import { NgModule } from '@angular/core';
import { RouterModule } from '@angular/router';
import { AppComponent } from './components/app/app.component'
import { NavMenuComponent } from './components/navmenu/navmenu.component';
import { HomeComponent } from './components/home/home.component';
import {
    ButtonModule,
    GrowlModule,
    FileUploadModule,
    DataTableModule,
    SharedModule
} from 'primeng/primeng';
export const sharedConfig: NgModule = {
    bootstrap: [ AppComponent ],
    declarations: [
        AppComponent,
        NavMenuComponent,
        HomeComponent
    ],
    imports: [
        RouterModule.forRoot([
            { path: '', redirectTo: 'home', pathMatch: 'full' },
            { path: 'home', component: HomeComponent },
            { path: '**', redirectTo: 'home' }
        ]),
        ButtonModule,
        GrowlModule,
        FileUploadModule,
        DataTableModule,
        SharedModule
    ]
};
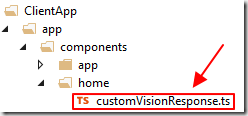
We need an Angular interface that can receive the prediction results from the server side controller, so we create a file, customVisionResponse.ts using the following code (this matches, in TypeScript, the server side CustomVisionResponse.cs class):
export interface ICustomVisionResponse {
    id: string;
    project: string;
    iteration: string;
    created: string;
    predictions: IPrediction[];
}
export interface IPrediction {
    tagId: string;
    tagName: string;
    probability: string;
}

Now, we alter the contents of the home.component.html file to the following:
<h4>Upload A File And Predict</h4>
<p-fileUpload name="myfile[]"
              url="api/upload"
              multiple="false"
              accept="image/*"
              maxFileSize="10000000"
              uploadLabel="Predict"
              (onSelect)="onSelect($event)"
              (onUpload)="onUpload($event)">
    <ng-template pTemplate type="content">
        <div *ngIf="(showPredictedImage)">
            <img [src]="PredictedImage" *ngIf="(PredictedImage != '')" [width]="600" />
            <p-dataTable [value]="this.CustomVisionResponse.predictions">
                <p-column field="tagName" header="Tag Name"></p-column>
                <p-column field="probability" header="Probability"></p-column>
            </p-dataTable>
        </div>
    </ng-template>
</p-fileUpload>
Note: This implements the custom template of the PrimeNG upload control that allows us to select an image, upload an image, then display the selected image and the results.
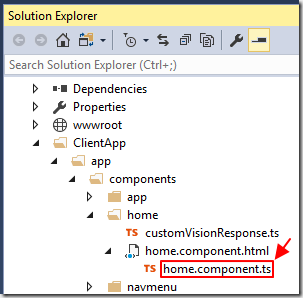
Finally, we alter the home.component.ts file to the following code:
import { Component, OnInit, OnDestroy } from '@angular/core';
import { Router, ActivatedRoute } from '@angular/router';
import {
    FileUploadModule,
    DataTableModule,
    SharedModule
} from 'primeng/primeng';
import { ICustomVisionResponse } from './customVisionResponse';
@Component({
    selector: 'home',
    templateUrl: './home.component.html'
})
export class HomeComponent implements OnInit {
    showPredictedImage: boolean;
    PredictedImage: string;
    CustomVisionResponse: ICustomVisionResponse;
    constructor() { }
    ngOnInit(): void {
        this.showPredictedImage = false;
        this.PredictedImage = "";
    }
    public onSelect(event) {
        // Set current image
        this.PredictedImage = event.files[0].objectURL;
        // We don't want to show PredictedImage now
        this.showPredictedImage = false;
    }
    public onUpload(event) {
        // The .Net controller will return the predicted results
        // as xhr.responseText - convert it to CustomVisionResponse
        this.CustomVisionResponse = JSON.parse(event.xhr.responseText);
        // We now want to show the PredictedImage and the results
        this.showPredictedImage = true;
    }
}
Notes
This example also demonstrates how to have the PrimeNG upload control call a server side method, passing the uploaded file(s), and receive (and parse) an object as a response.
Links
Download
You can download the code from the Download page