5/23/2020 Webmaster
Creating a Bot Using Power Virtual Agents

It allows your non technical Subject Matter Experts (SMEs) to monitor the Bot using the built-in analytics, and to update and enhance the Bot using an online web interface.
Getting Started
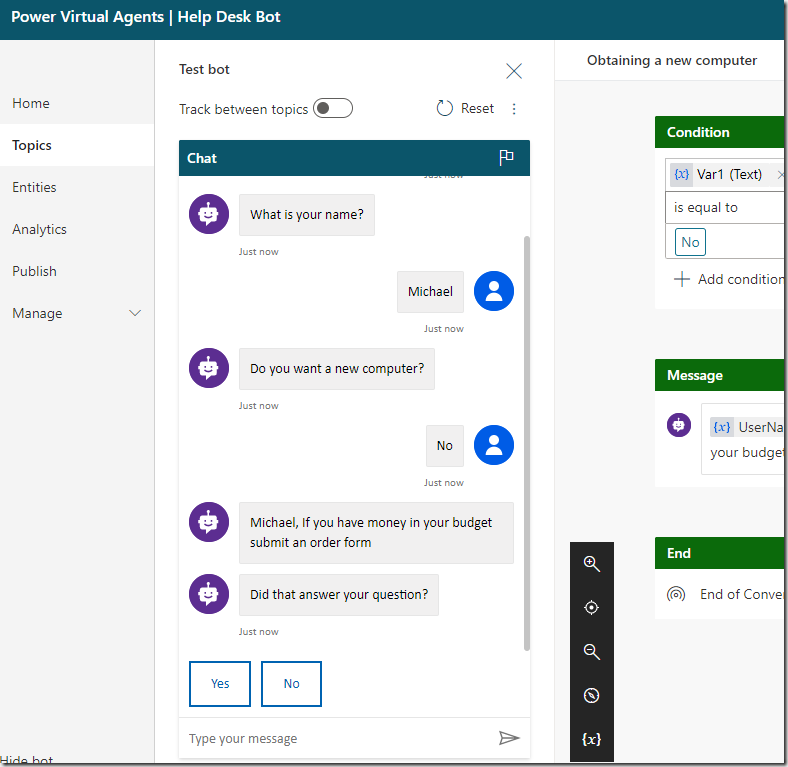
To get started, go to: https://powervirtualagents.microsoft.com/ and Sign in (using your Microsoft work or school account) to create your Microsoft Power Virtual Agents Bot.
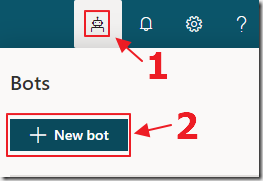
Select the Bot icon and select New bot…
(Note: If you run into any issues, see: https://docs.microsoft.com/en-us/power-virtual-agents/fundamentals-get-started)
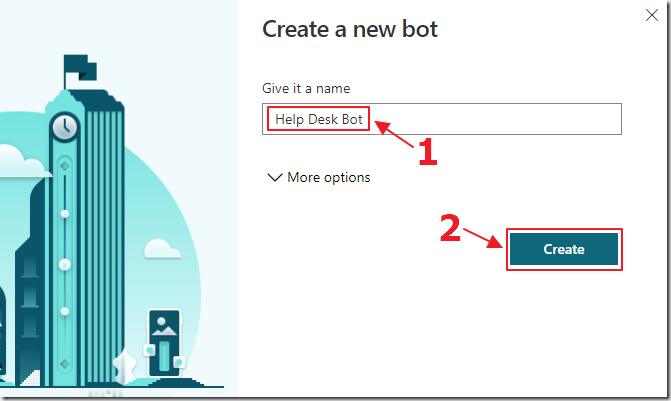
Give the Bot a name and select Create.
Your Bot will be created.
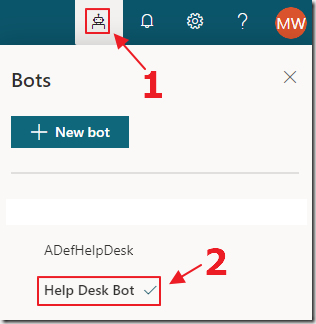
Note: You can add multiple Bots, and navigate between them, by selecting the Bot icon, and then selecting the desired Bot.
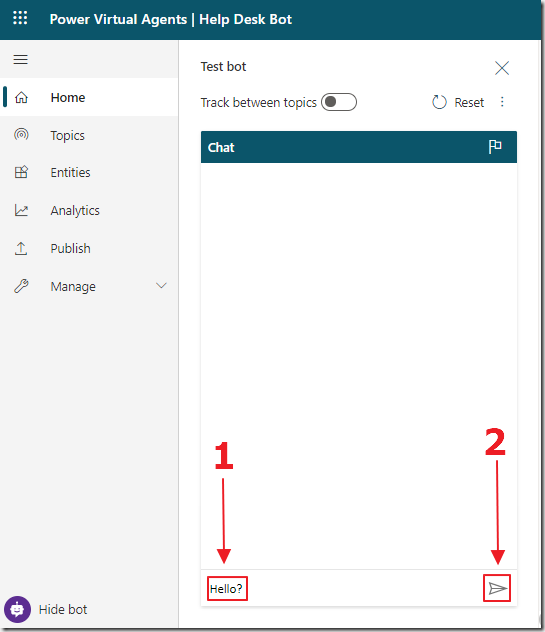
You can chat with the Bot using the Chat window.
Enter Hello? and click the send button.
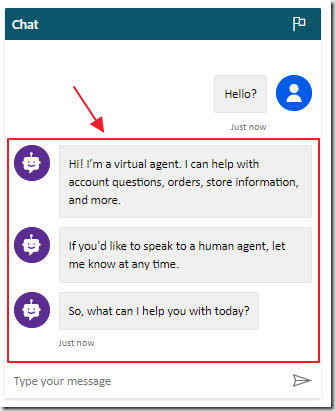
The Bot will display a response.
Working With Topics
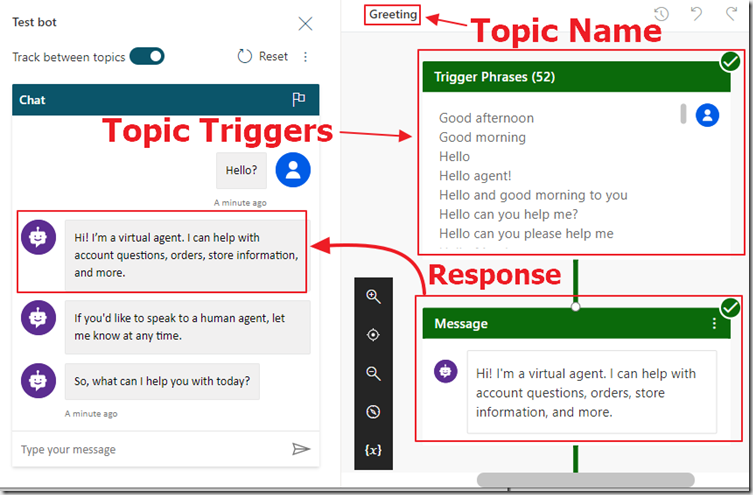
Click on one of the responses in the Chat window and you will see:
- Topic Name – The Bot is organized by Topics. A Topic is a grouping of a single conversation path.
- Topic Trigger Phrases – A Topic is started when one of its trigger phrases has been detected.
- Message – The Bot responds to a user using the Message element. You can always find that element, and the Topic that it is contained in, by clicking on it in the Chat window.
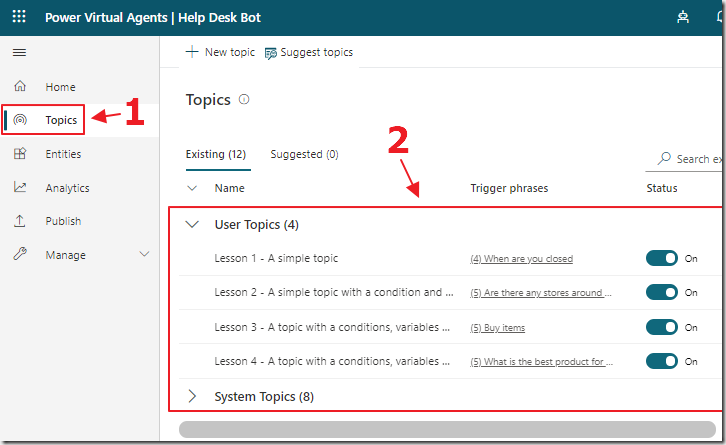
You can see all available Topics for the Bot by clicking on the Topics link in the main menu bar.

You can create a new Topic by clicking on the New topic button.
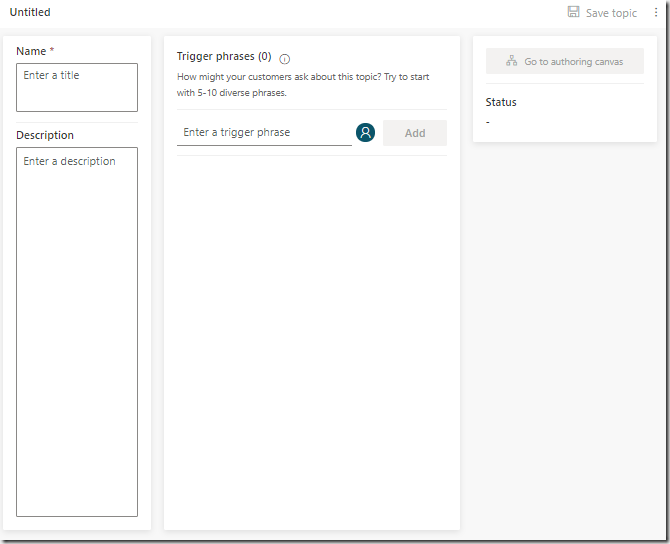
The New Topic screen will display.
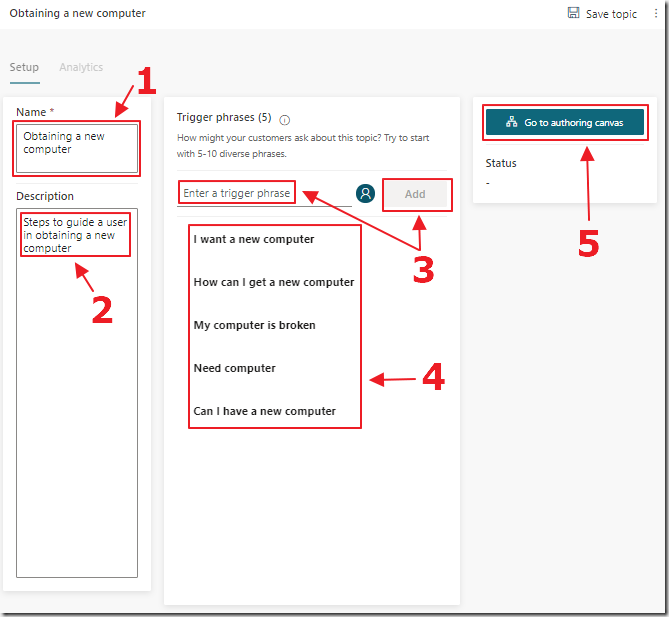
Fill out the form and click the Edit button.
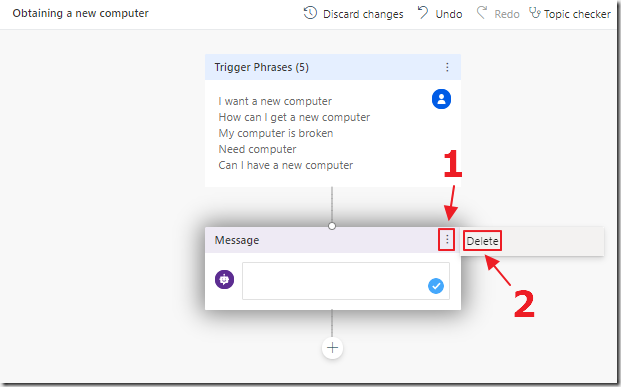
You will be presented with a Message box.
Delete it.
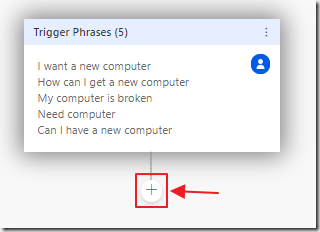
Select the Add Node button.
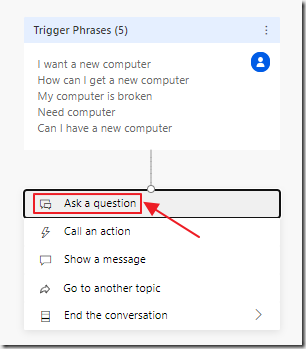
Select Ask a question.
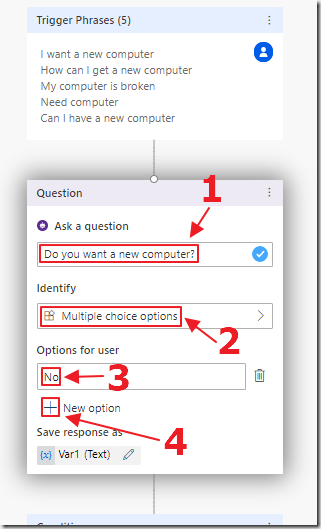
Enter a question and No as the first multiple choice option, and click the Add Node button to add additional possible response options.
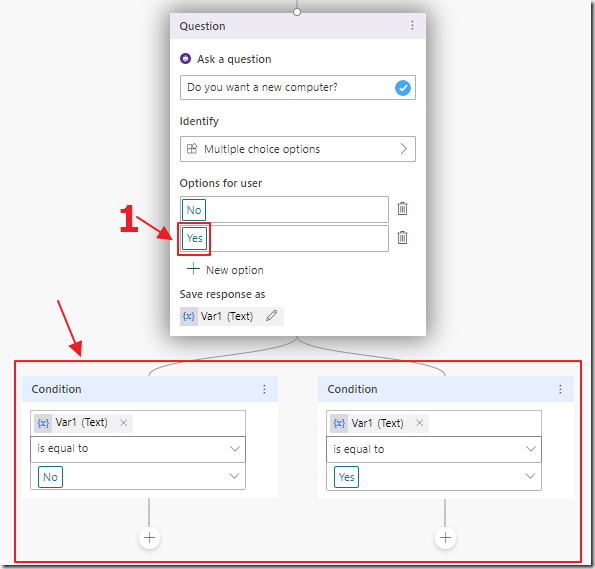
Enter Yes as the additional option.
A conversation path will display for each option you create.
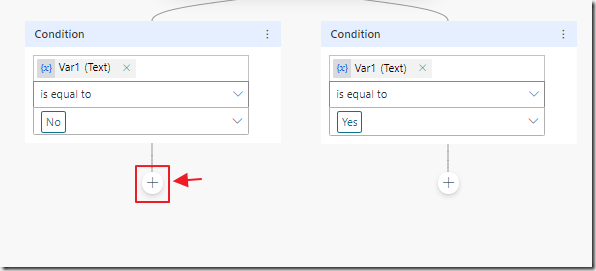
Click the Add Node button under the No option.
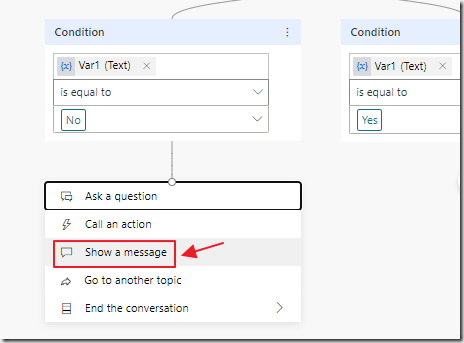
Select Show a message.
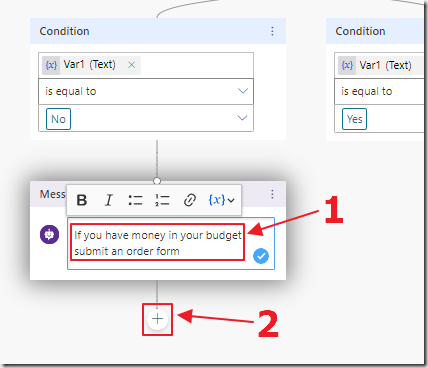
Enter a message and click the Add Node button.
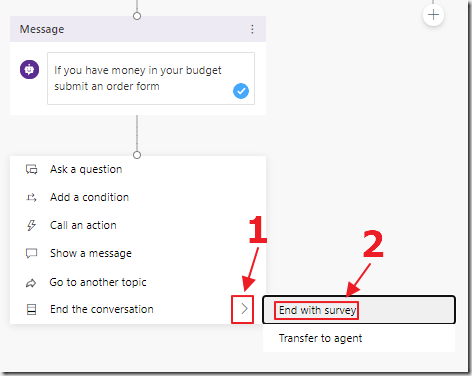
Select End the conversation, then End with survey.
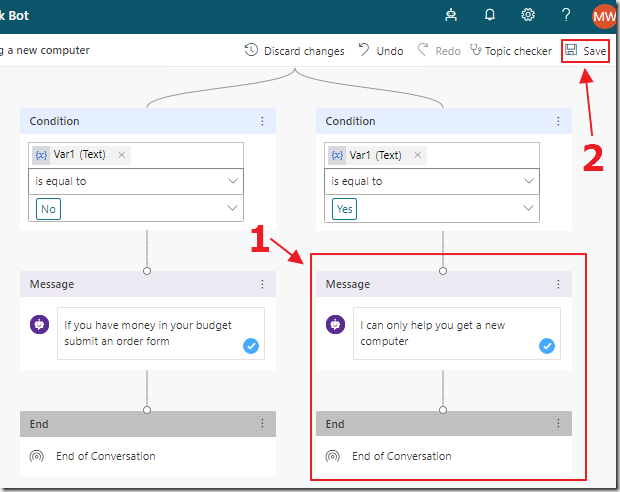
Design a response for the Yes branch.
Save your Bot.
Testing and Debugging Your Bot
![]()
Note: If your Chat window ever disappears, you can always bring it back by clicking the Test your bot link.
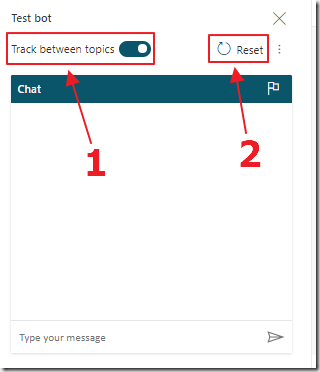
In the Chat window, turn on Track between topics and click the Reset button.
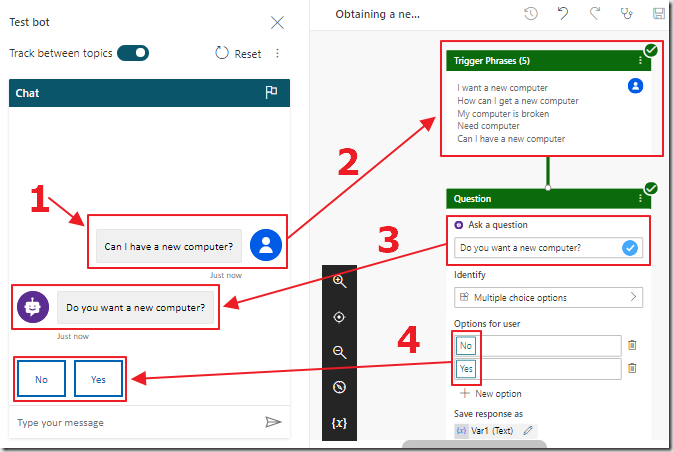
Enter one of the trigger phrases for your new Topic and you will be able to trace and debug the conversation.
Working With Variables
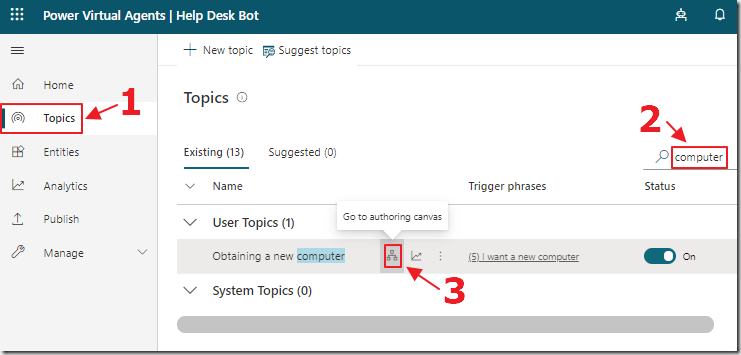
You can use variables to allow you Bot to capture and use conversation path data such as remembering a person’s name.
Return to your Topic.
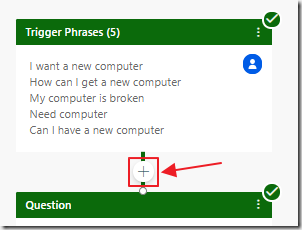
Hover your mouse pointer between the Trigger Phrases box and the Question box and click on the Add Node button.
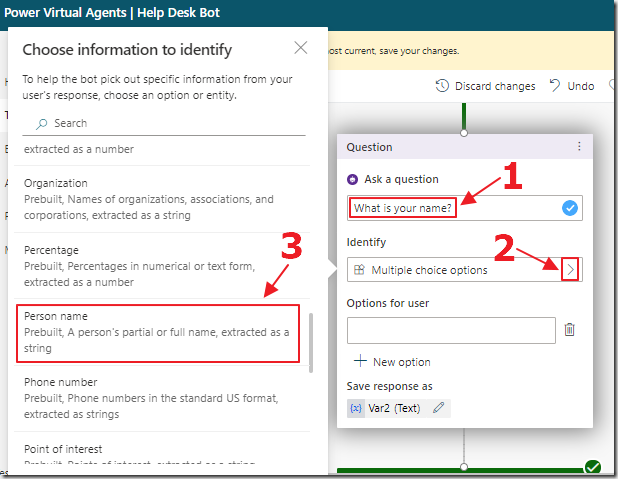
Select Ask a question.
Enter What is your name? and select the arrow next to Identity then select Person name as the type.
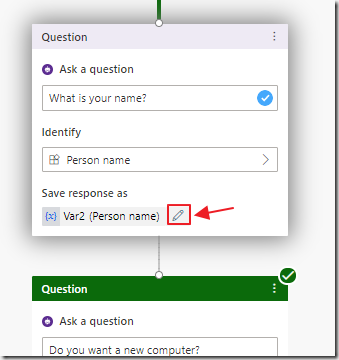
Click the edit button next to the variable name.
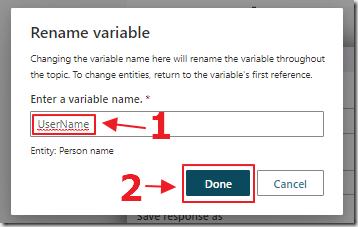
Rename it to UserName.
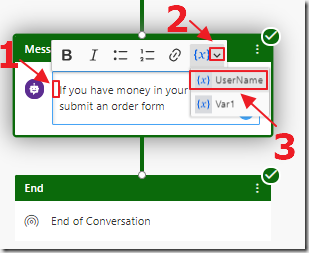
You can now select any Message box, and select the variable from the variable drop down.
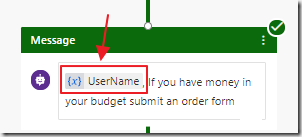
The variable will be inserted.
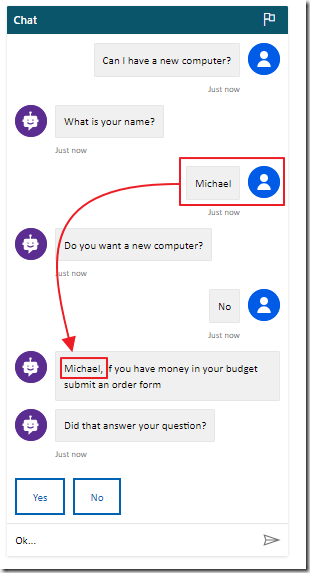
When we save the Topic, return to the Chat window, and click the Reset button, we will see the value, entered for the variable, used in the conversation.
Deploy
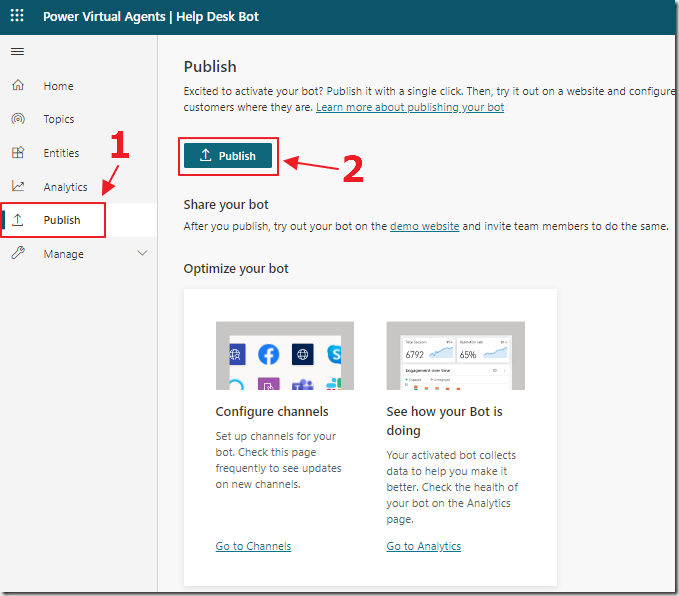
To Deploy the Bot, select Publish from the main menu.
Select the Publish button.
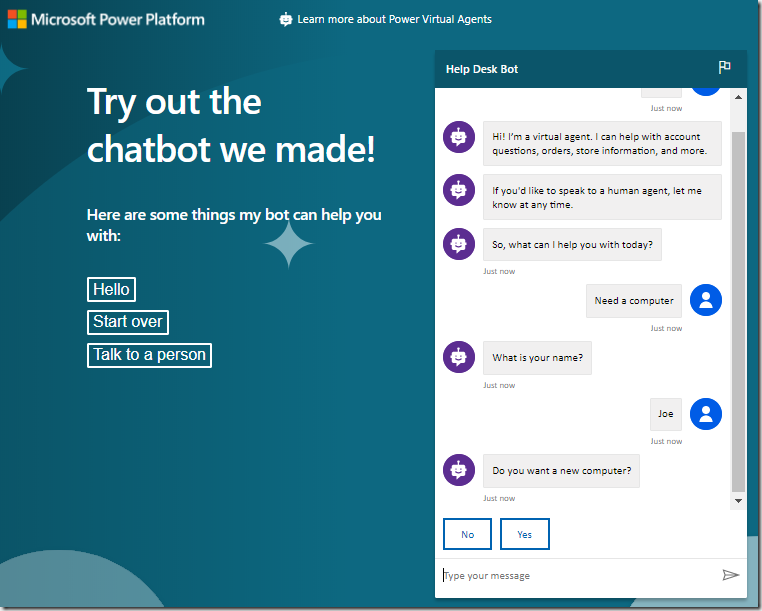
This will take you to a page that allows you to chat with the Bot.
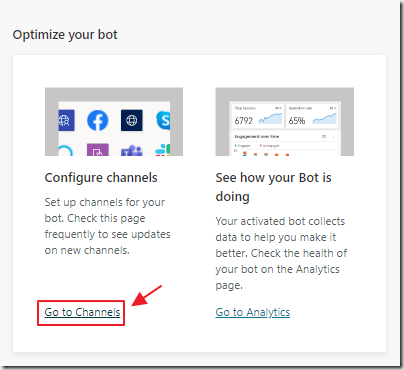
The Publish menu also allows you to configure channels for your Bot.
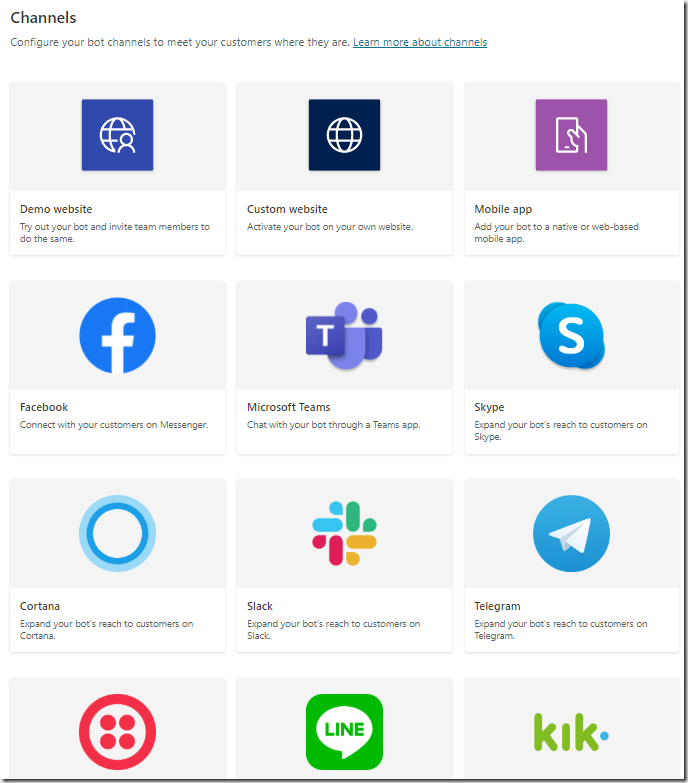
A large number of channels to connect your Bot to are available.
Analytics
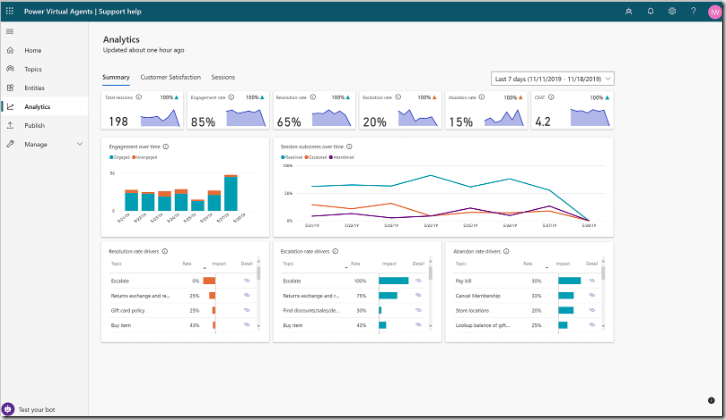
You can click on the Analytics link to monitor the interactions with your Bot.
Price
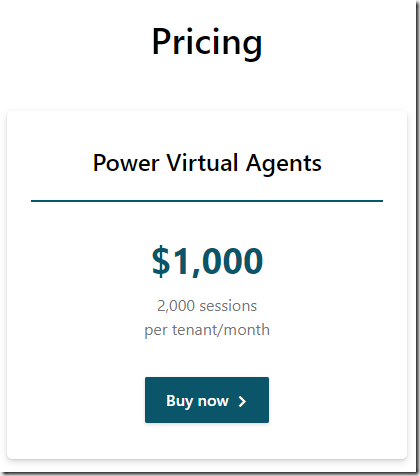
Currently the price is $1,000 for 2,000 sessions per tenant/month.
